

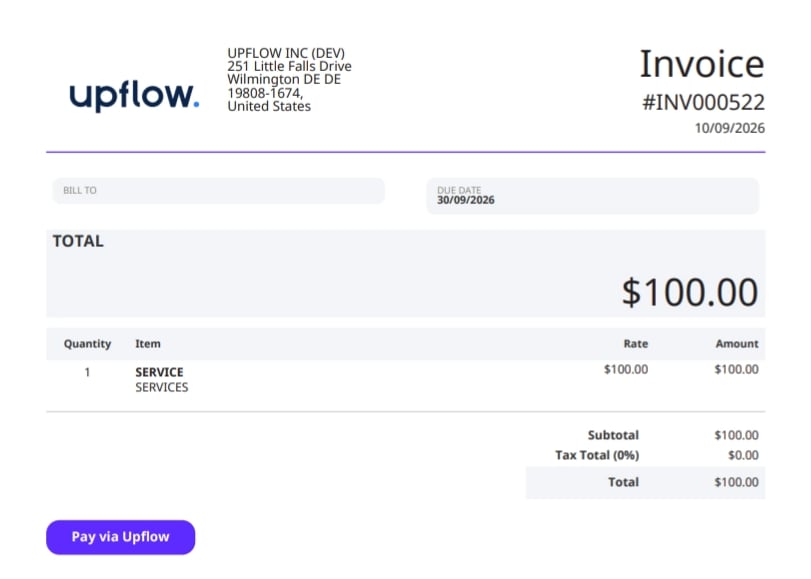
How it works
- Upflow exports each customer’s portal URL to a custom field on the NetSuite customer record.
- A transaction body field copies that URL onto every new invoice for the customer.
- Your invoice’s Advanced PDF/HTML template shows the URL as a button, but only when the field has a value.
Before you start
- NetSuite must be connected to Upflow.
- You need a NetSuite role with permission to create custom fields and edit transaction forms and Advanced PDF/HTML templates.
- Your invoice form must use Advanced printing, not Basic.
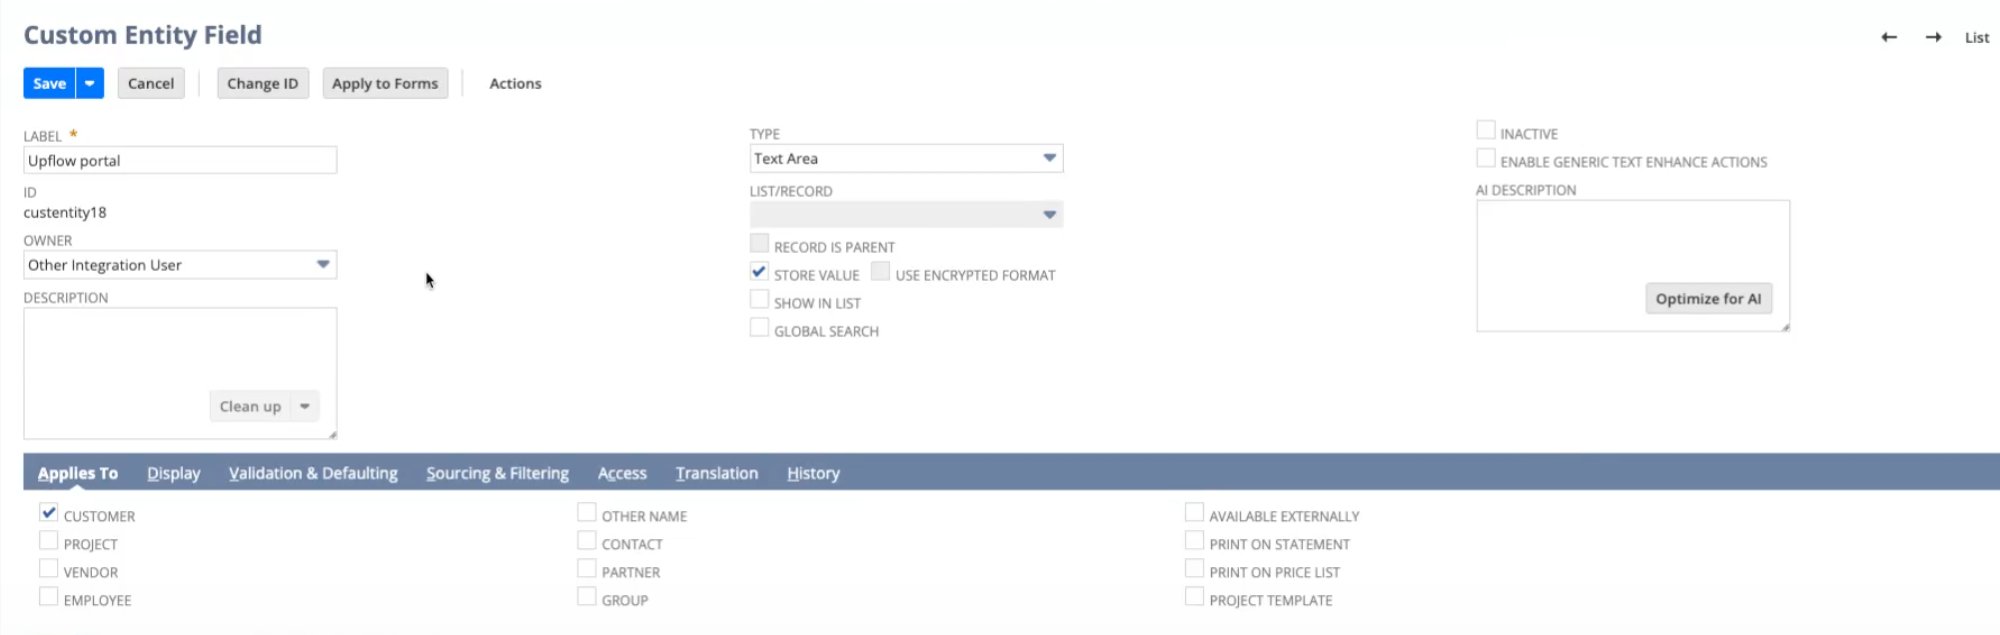
Step 1: Create the customer field
- In NetSuite, go to Customization → Lists, Records, & Fields → Entity Fields and click New.
- Enter a Label that’s easy to find later, such as
Upflow portal. - Set Type to Text Area. Portal URLs are long, and a free-form text field can cut them off.
- On the Applies To subtab, check Customer.
- Click Save.
Step 2: Export the portal URL from Upflow
- In Upflow, go to Settings → Integrations and scroll to Export to NetSuite.
- Turn on the Export to NetSuite toggle if it isn’t on already.
- Add a row that maps the Customer portal URL Upflow field to the NetSuite field you created in step 1.
- Click Save.
Step 3: Create the transaction body field
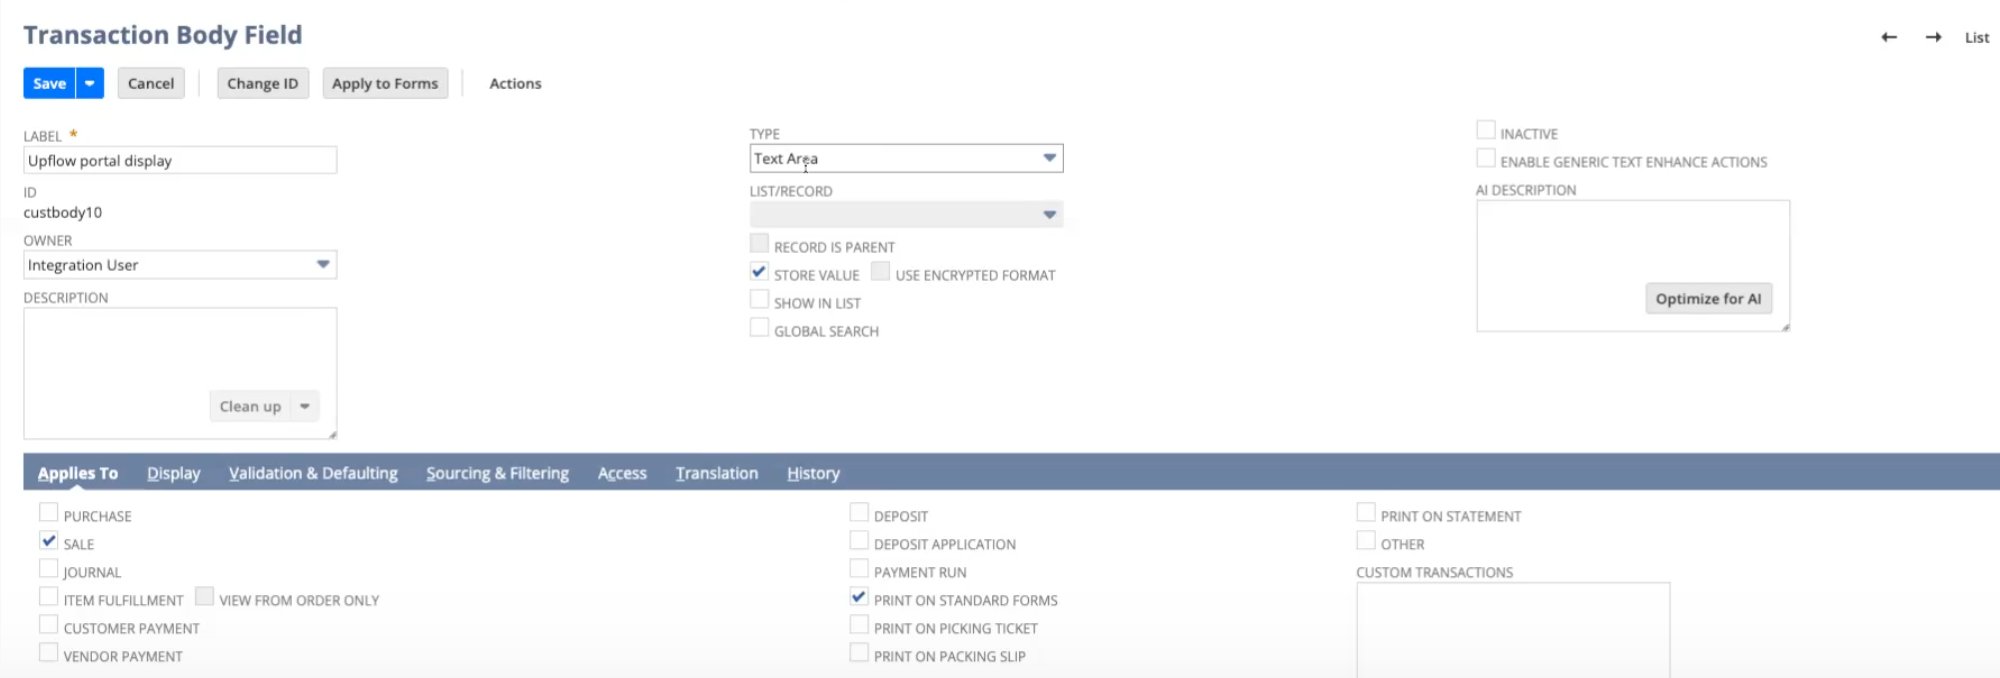
This field copies the portal URL from the customer onto each invoice, so the PDF template can read it.- Go to Customization → Lists, Records, & Fields → Transaction Body Fields and click New.
-
Enter a Label, such as
Upflow portal display. - Set Type to Text Area. It must match the type of the customer field.
-
On the Applies To subtab, check Sale and Print on standard forms.
-
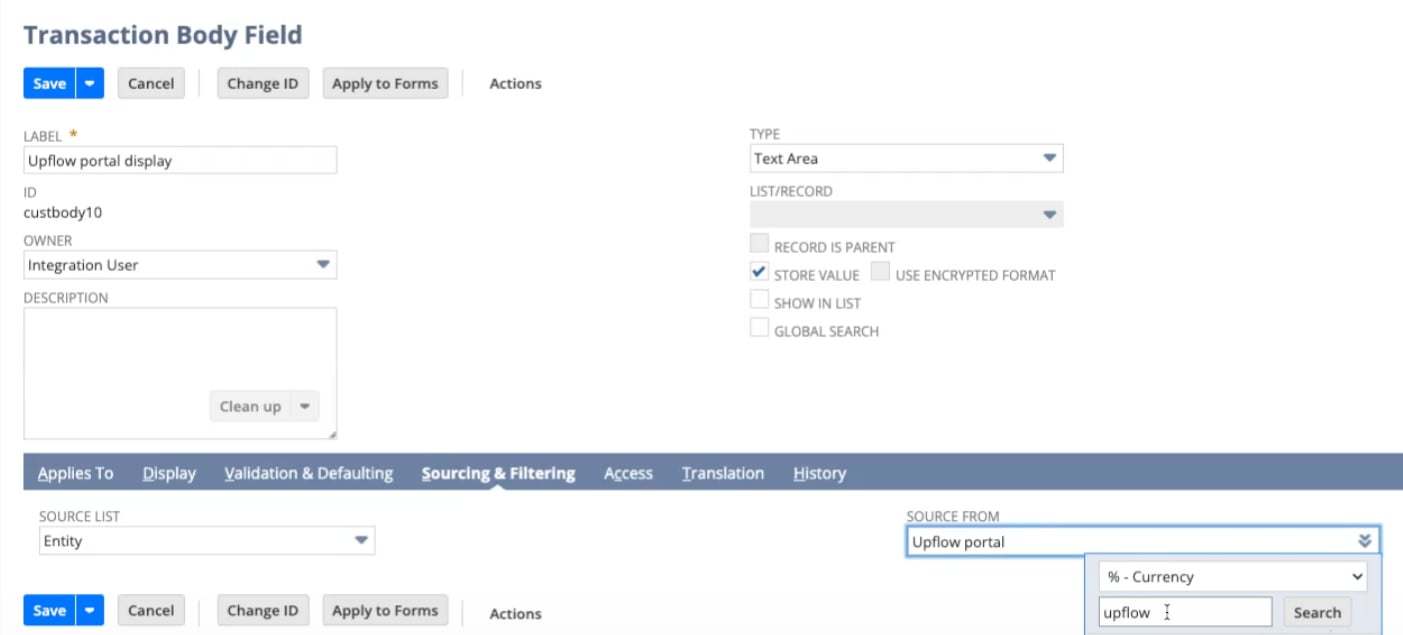
On the Sourcing & Filtering subtab:
- Set Source List to Entity.
- Set Source From to the customer field from step 1. Type
upflowin the search box to find it quickly.
- Click Save.
-
In the Transaction Body Fields list, find your new field and note its ID, for example
custbody10. You need it in step 5.
Step 4: Show the field on your invoice form
- Go to Customization → Forms → Transaction Forms and click Edit next to the form your invoices use.
- Note the Print Template and Email Template values. You’ll edit these templates in the next step.
- Open the Screen Fields subtab, then the Custom subtab.
- Find the transaction body field from step 3 and check Show.
- Click Save.
Step 5: Add the button to your PDF template
- Go to Customization → Forms → Advanced PDF/HTML Templates.
- Click Edit next to the template your invoice form uses. If the print and email templates are different, repeat these steps for both.
- Turn on Source Code.
-
Paste this snippet where you want the button to appear, for example just after the totals table. Replace
custbody10with your field ID from step 3.The<#if ... ?has_content>check hides the button when the invoice has no portal URL. Without it, customers could see a button that doesn’t work. If you prefer a plain text link, use this instead: - Click Save.
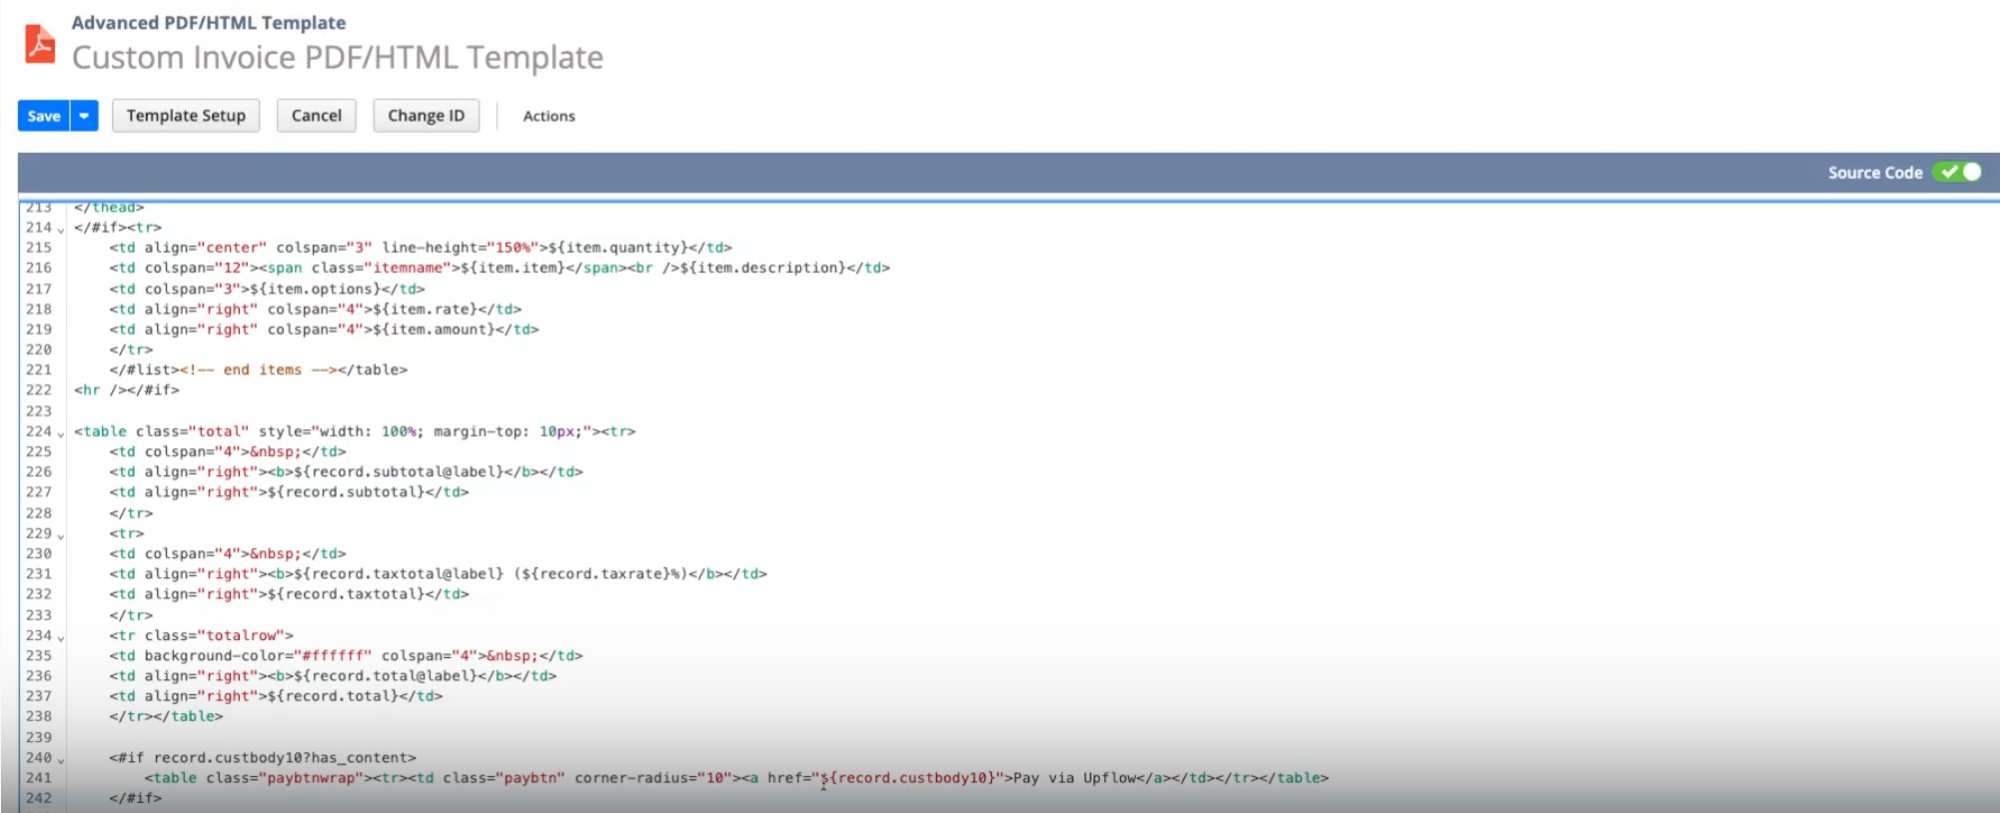
Step 6: Test with a new invoice
The portal URL is copied onto an invoice when the invoice is created. Invoices that already exist, including ones you’ve already sent, don’t get the link.- Create a new invoice for a customer whose portal URL has been exported from Upflow.
- Make sure the invoice uses the form you edited in step 4.
- Click Print. The PDF now shows the Pay via Upflow button, and clicking it opens that customer’s Upflow portal.
Good to know
- If the button doesn’t appear, check that the customer record has a value in the customer field from step 1. Then check that the invoice was created after you finished the setup.
- The field ID in the template must match your transaction body field exactly, for example
record.custbody10.