


Before you start
Collection agents act on the replies that land in your Upflow inbox, so you first need to be managing replies in Upflow. If you haven’t already, turn on Handle replies in Upflow and set up reply import — see Manage your customers’ replies in Upflow. Only admin users can create and configure collection agents.What a collection agent can do
An agent is made up of three skills. Each one works on the inbound emails matched to a customer in your Upflow inbox:- Replies — handles inbound customer emails in the AR Inbox by drafting or sending a response.
- Promise to pay — detects when a customer commits to a payment date and creates a promise to pay from the email.
- Disputes — detects when a customer contests an invoice and creates a dispute from the email.
Autonomy modes
Each skill runs at one of three autonomy levels. You set them independently, so a single agent can, for example, only suggest replies while automatically logging promises to pay.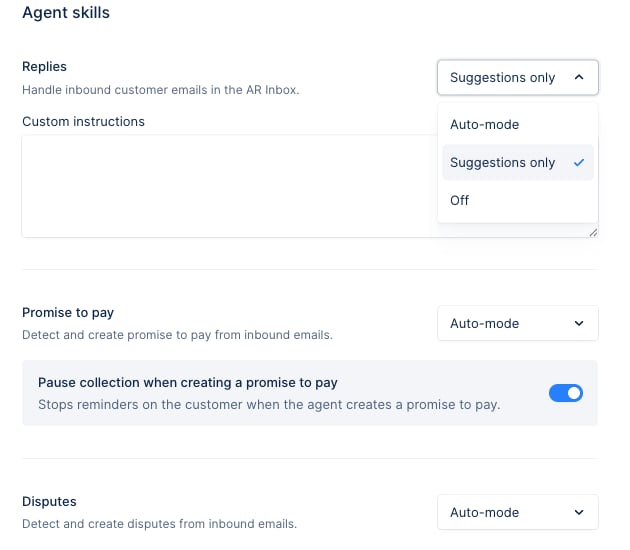
When a skill is in Auto-mode, the agent only executes automatically when it is confident. If there is any doubt, then it will act as if it was in the Suggestions-only mode, so you can take over. Emails that don’t need an answer — a simple “thanks”, for example — are left alone.
Create a collection agent
- Go to Collection agents in your settings.
- Click New agent.
- Give the agent a Name and pick an Avatar colour. The name and avatar are how the agent’s actions are identified across Upflow, so choose something recognisable (for example, the segment it serves).
-
Under Agent skills, set a mode for each of Replies, Promise to pay and Disputes.
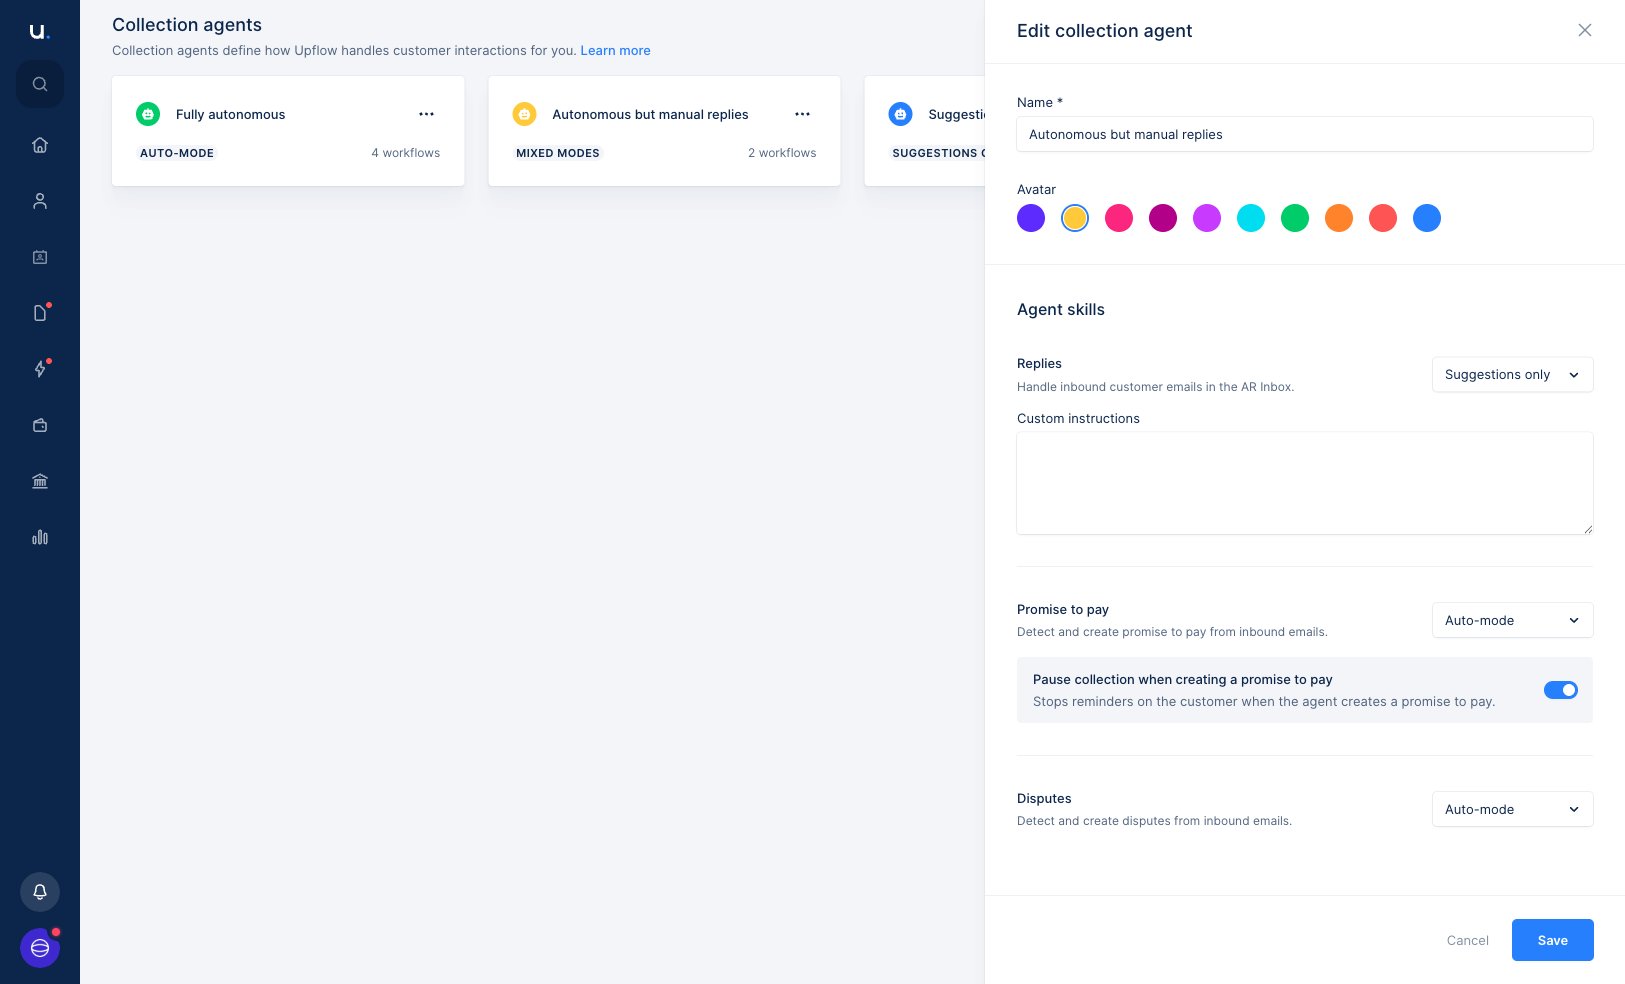
- (Optional) Add Custom instructions for the Replies skill to steer the agent’s tone and content — see Custom instructions below.
- (Optional) Keep Pause collection when creating a promise to pay enabled so that reminders stop for a customer once the agent logs a promise to pay. This is on by default.
- Click Save.
Assign an agent to a workflow
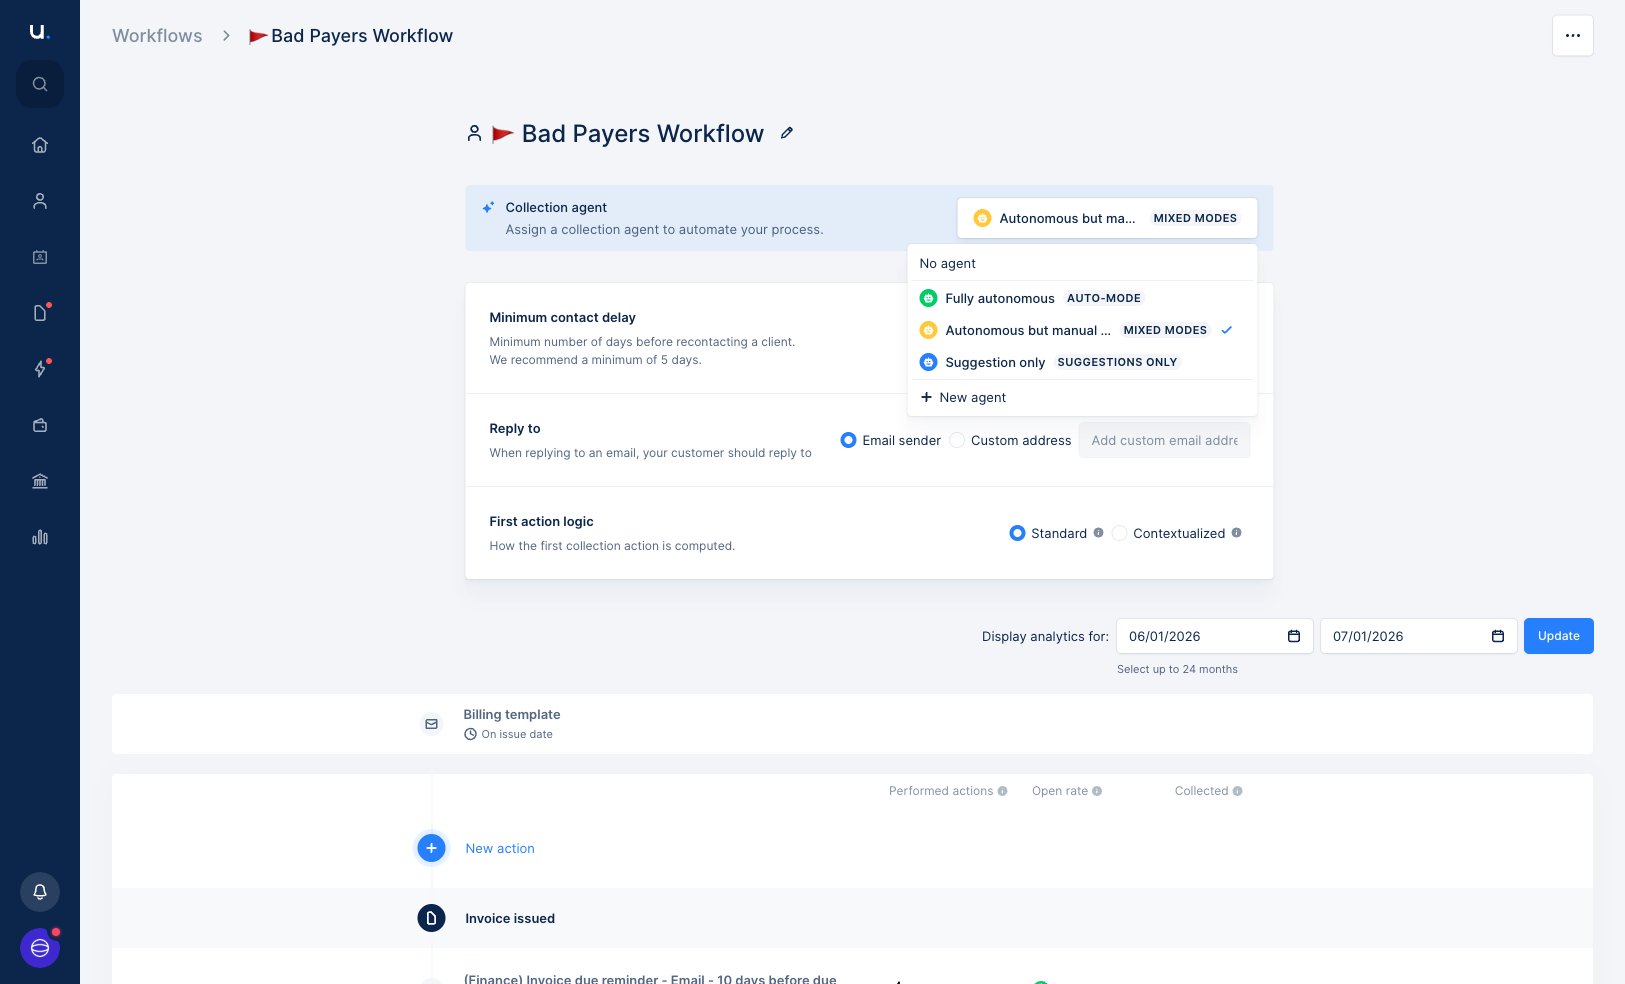
An agent only starts working once it’s attached to a workflow. Workflows decide which customers each agent handles.- Open the workflow you want the agent to run on, from Settings > Workflows.
- In the Collection agent block at the top of the workflow, open the agent picker.
-
Choose an agent from the list — or select No agent to remove one. You can also create a new agent from here.
Review a suggested reply
When the Replies skill is in Suggestions only mode, the agent drafts a reply and leaves it for you — it never sends on its own. You’ll find the draft in the reply action, alongside your other actions in the Actions list. Open the action and the draft appears in the Email composer. A banner names the agent that wrote it, and the recipients, subject and message are pre-filled.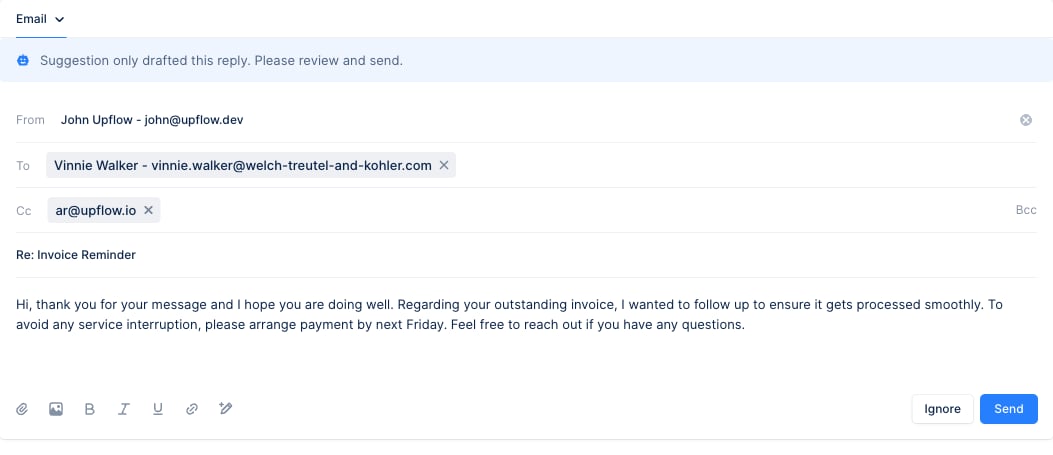
- Edit the draft — adjust the wording, recipients or subject before you send.
- Send the reply as it stands once you’re happy with it.
- Ignore the action if no reply is needed.
Custom instructions
The Replies skill accepts free-text custom instructions that run alongside Upflow’s own guidance whenever the agent drafts a reply. Use them to set the tone, spell out how to handle recurring situations, or tell the agent when to hand a conversation back to a human.Good to know
- You stay in control. In Suggestions only mode, nothing is sent or created until you confirm it. Agent actions appear in your timelines and actions list just like manual ones, identified by the agent’s name and avatar.
- The agent works from what’s in Upflow. Its answers are based on the customer, invoice and conversation data available in Upflow, which is why it won’t reply when it isn’t confident.
- Sender address. In Auto-mode, replies are sent from the alias the customer originally wrote to. If the recipient address isn’t a recognised alias in your organization, the reply is left as a manual action for you to send.
- Deactivating an agent. Removing an agent from a workflow stops it from acting on that workflow’s customers; the workflow keeps running its reminders as normal.