✅ What you’ll have at the end (quick preview)
By the end of this step, you’ll have:- At least one workflow configured with clear owners, senders, and recipients
- Actions set up with the right timing (pre-due / overdue) and automation level (automatic vs manual)
- A tested workflow assignment so you can confidently move to Step 6 without surprises
Actions
- Create workflows
- Assign customers to your workflows
🔀 Choose your approach
Start simple if:- This is your first time setting up workflows
- Most customers can follow the same reminder path
- You want to validate the basics quickly (timing, templates, owners)
- You have clear segments (SMB vs Enterprise, regions, strategic accounts)
- You need different owners/senders/templates by segment
- You want multiple strategies running in parallel (e.g., pre-due + overdue escalation)
- 1–2 workflows
- Basic logic
- Segmented workflows
- Complex smart rules
Key decisions
- Timing and frequency of actions
- Segmentation strategy
- Level of automation
Creating a Workflow
Workflows define how you follow up with customers over time. They determine when actions happen, what type of action is created, and who is responsible for each step. Start with a simple workflow first. You can always refine the timing, wording, ownership, and general complexity later. Click Get Started in the interactive guide below to follow along, or follow the steps outlined in this article.Start from your workflow settings
Go to the Workflows section and create a new workflow. Choose a clear name that your team will recognize, such as Standard collection workflow, Enterprise customers, or Pre-due date reminders.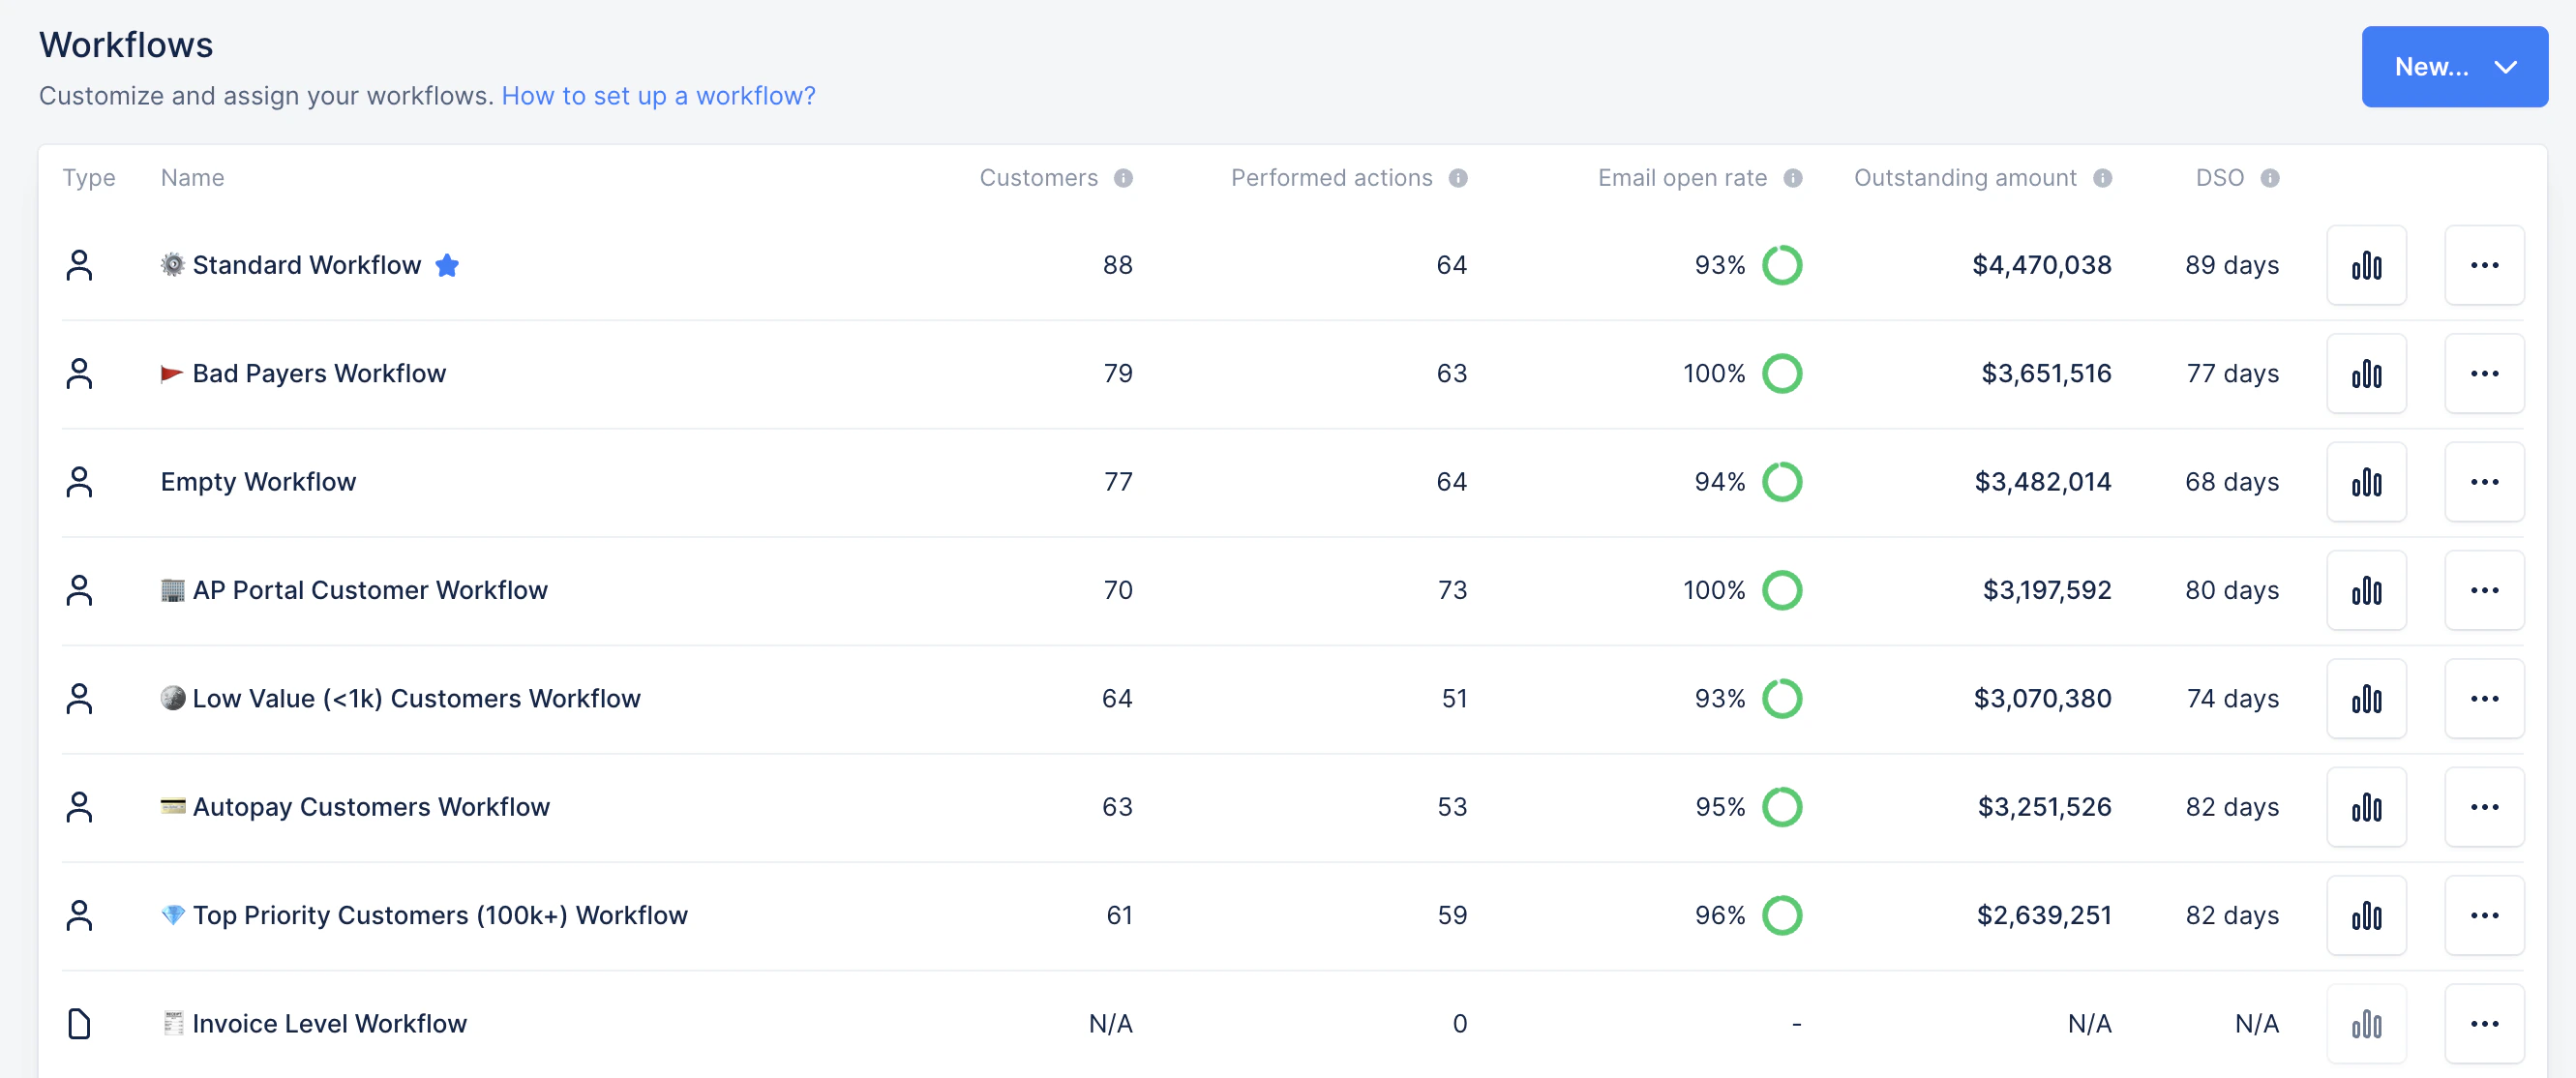
Set the minimum contact delay
The minimum contact delay is the minimum number of days Upflow waits between two follow-ups to the same customer.
If customers receive reminders too frequently, increase your minimum contact delay (and remember weekends affect spacing). For a standard workflow, a good starting point is 5 days. This usually allows you to follow up about once per week without overwhelming the customer. ⚠️ Upflow does not send reminders on Saturdays or Sundays, so keep this in mind when setting your minimum contact delay.
Choose the first action logic
The first action logic decides where a customer starts when they are assigned to the workflow.
| Option | What it means | When to use it |
|---|---|---|
| Standard | The customer starts at the first step of the workflow. | Use this if you want every customer to go through the full sequence from the beginning. |
| Contextualized | The customer starts at the step that best matches how overdue they already are. | Use this if you already have overdue customers and do not want to restart them at step one. |
Understanding the carrying invoice
The carrying invoice is the invoice that determines where the customer is in the workflow. For customer-level workflows, this is usually the oldest overdue invoice that is still open. Upflow uses it to decide which workflow step applies and when the next action should happen. Example: If a customer has three open invoices and the oldest overdue one is Invoice A, Upflow typically uses Invoice A as the carrying invoice to place the customer in the right step and schedule the next action.Create your workflow actions
An action is one step in the workflow. Action types include: For each action, choose when it should occur, such as 7 days after the issue date, 5 days before the due date, or 30 days after the due date. Then decide whether the action should be automatic or manual.| Type | What it means | When to use it |
|---|---|---|
| Automatic | Upflow sends the action automatically. | Best for standard email reminders. |
| Manual | A user completes the action from their to-do list. | Best for calls, sensitive accounts, escalations, or final notices. |
Choose the action owner
The owner is the person responsible for the action.
Choose the sender
The sender is the person or email address the customer sees when they receive the message.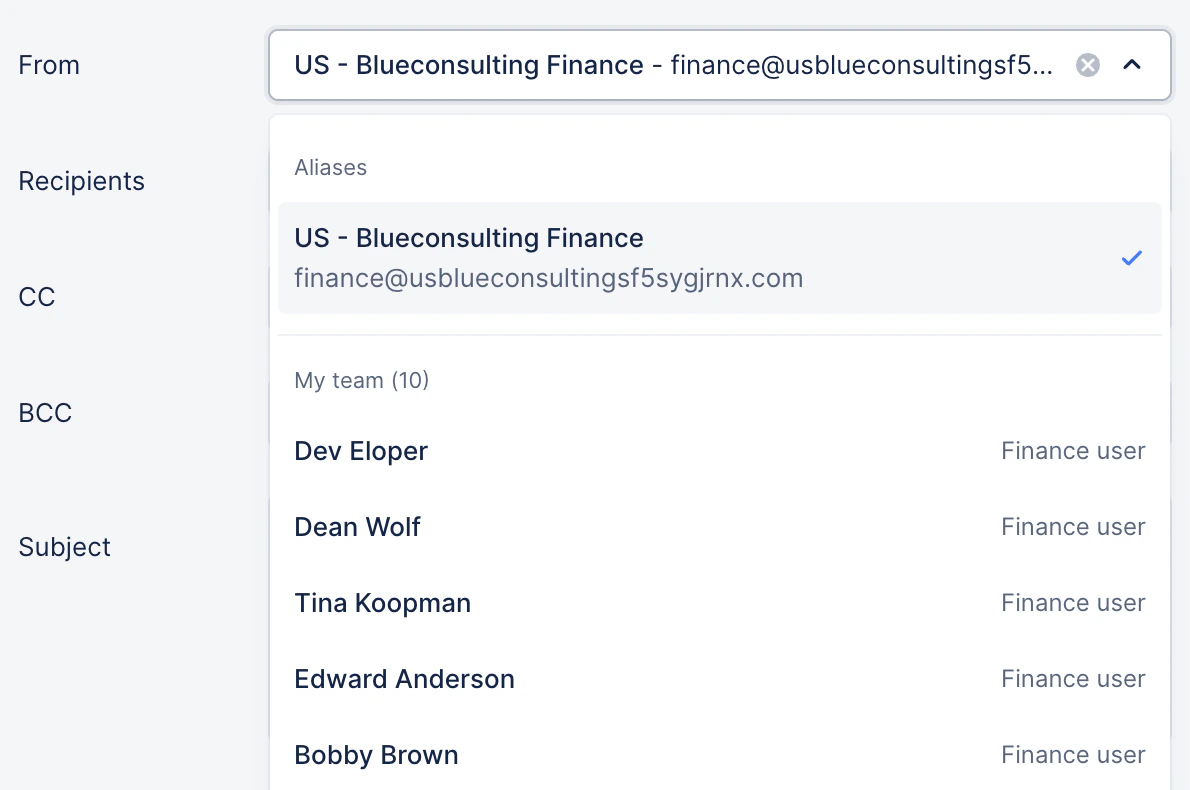
Choose the recipient
The recipient is the customer contact who receives the message.

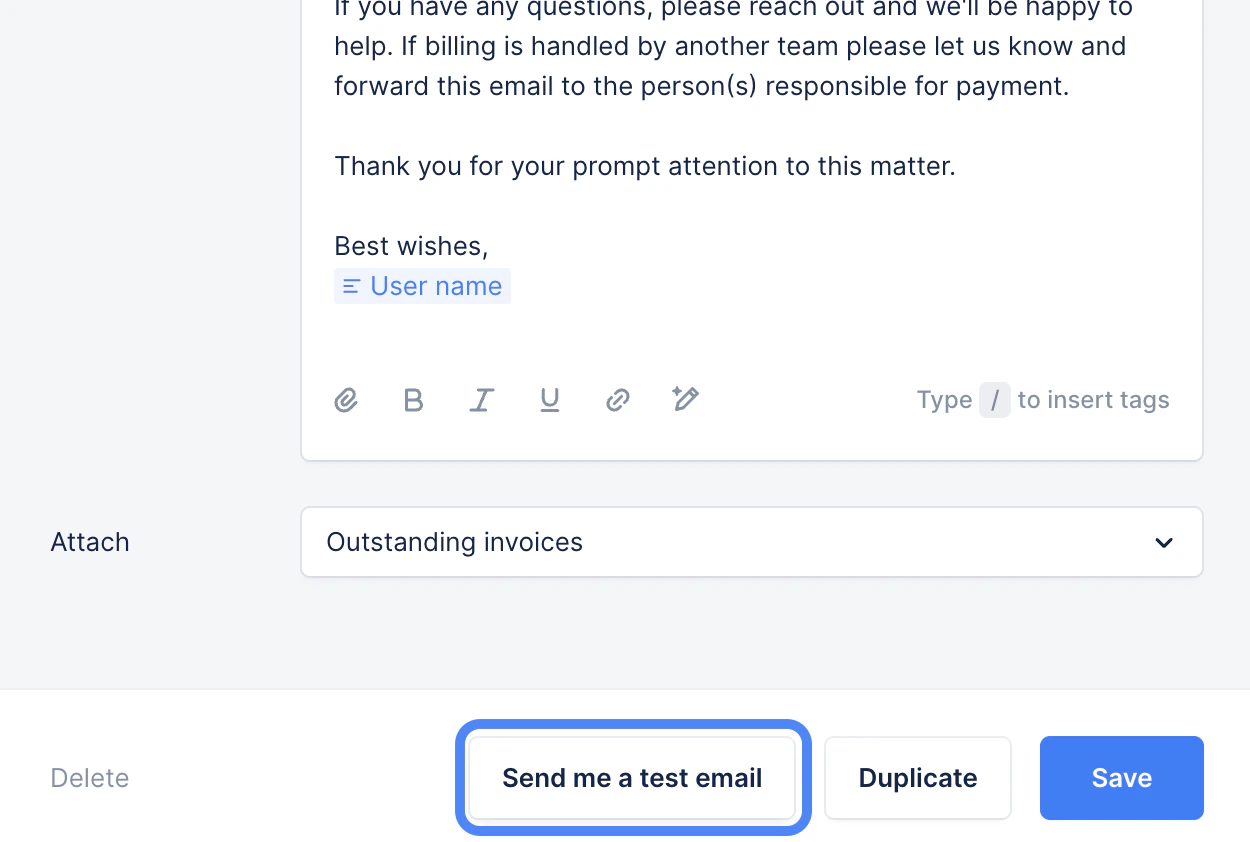
Select or edit the message template
Edit the message customers will receive to suit the stage in the escalation. Utilize custom tags to customize the communication with the most important information for your customers.
Review the final action
The final action can repeat until the carrying invoice is paid.
Save and test
Before using the workflow, review the key details:- The workflow name is clear
- The minimum contact delay matches your process
- The first action logic is correct
- Each action has the right timing
- Owners, senders, and recipients are correct
- Templates are ready
If templates look correct in-editor but break in real emails, always rely on test emails to confirm tag resolution and formatting.
Assign workflows to your customers or invoices
Once you’re confident with your workflows - assign customers or invoices to them manually, in bulk, or with Smart Rules. Rollout tip (recommended): Start with a small pilot group (e.g., 5–10 customers) for 1–2 days before assigning workflows in bulk. This helps you confirm timing, recipients, and templates in real conditions. Before go-live, check a few examples to confirm the upcoming actions are scheduled as expected. You can do this from Actions → ALL.✅ Validation (required to continue)
- At least one workflow created
- Workflows are assigned correctly to your customers or invoices