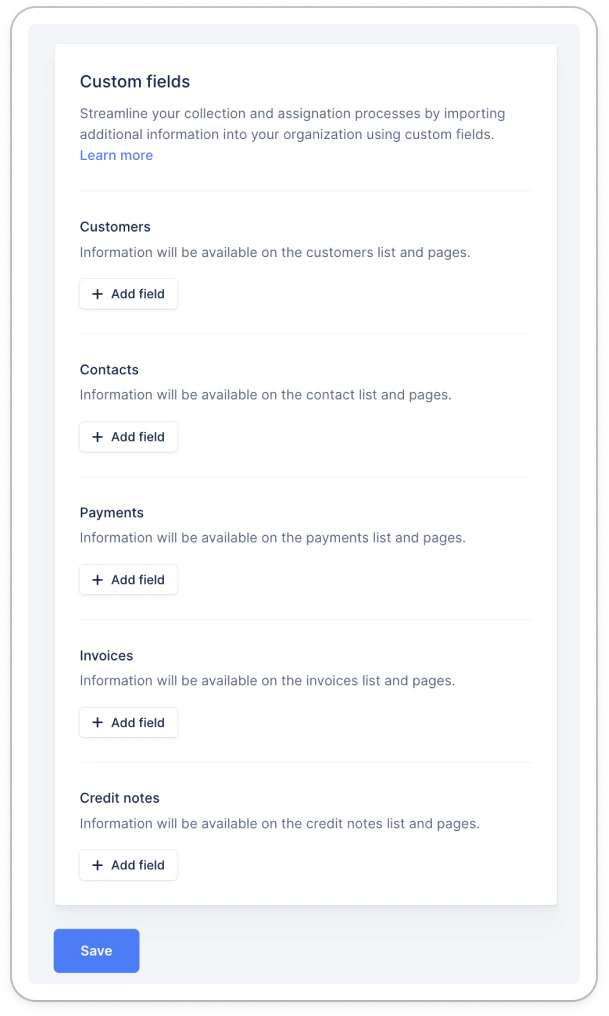
Availability and management
❗Only customer custom fields can be imported from your source system and your CRM. Only NetSuite, QuickBooks, and Stripe Billing allow a sync at the invoice level. An API connection also allows you to update your invoices.| Source | Clients | Invoices | Credit notes & payments |
|---|---|---|---|
| In-app | ✅ | ✅ | ✅ |
| API | ✅ | ✅ | ❌ |
| Chargebee | ✅ | ❌ | ❌ |
| NetSuite | ✅ | ✅ | ✅ (custom fields only) |
| Pennylane | ❌ (Native fields only) | ❌ | ❌ |
| Sage Intacct | ✅ | ✅ | ✅ |
| Stripe billing | ✅ | ✅ (custom fields only, Metadata) | ✅ (paymentcustom fields only, Metadata) ❌ Credit notes not supported |
| Salesforce | ✅ | ❌ | ❌ |
| Sellsy | ✅ | ❌ | ❌ |
| QuickBooks | ❌ (Native fields only) | ✅ Custom fields only | ❌ |
| Xero | ✅ | ❌ | ❌ |
| Zuora | ✅ | ✅ | ❌ |
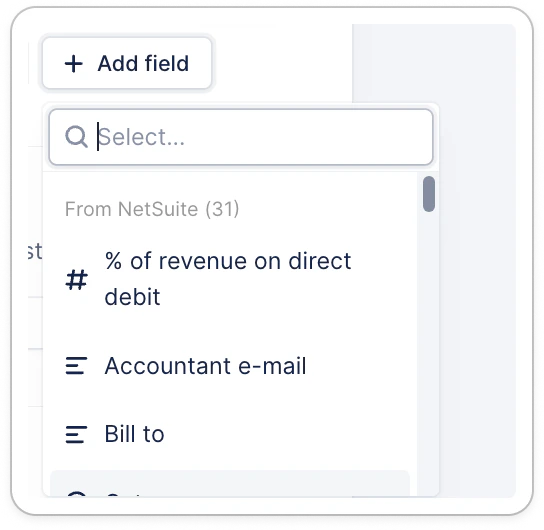
Create a custom field in Upflow
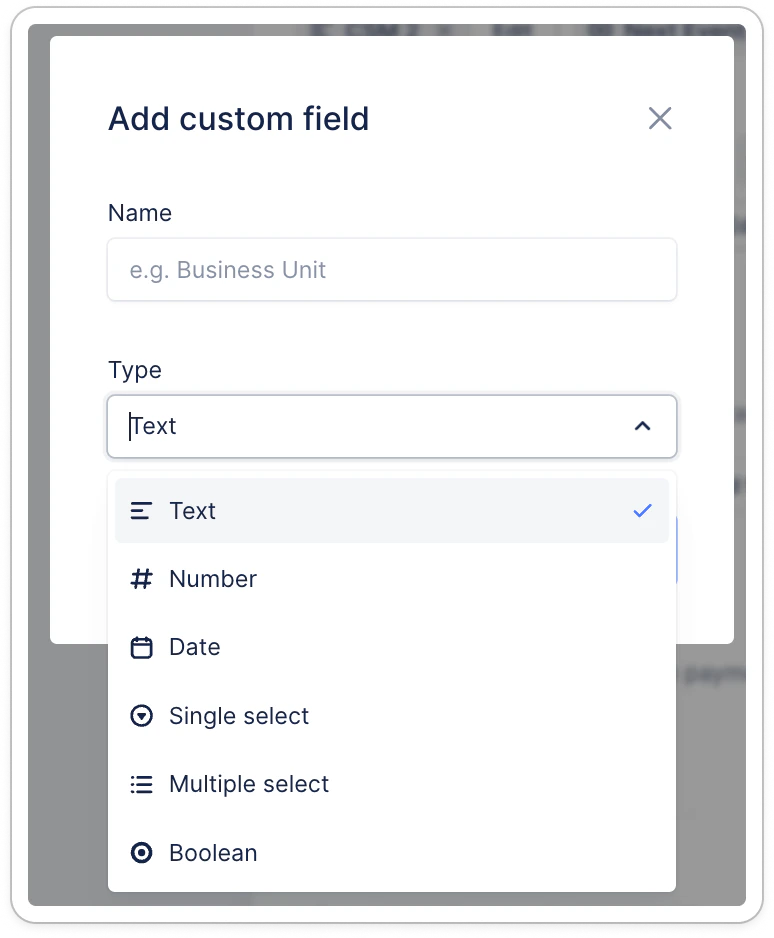
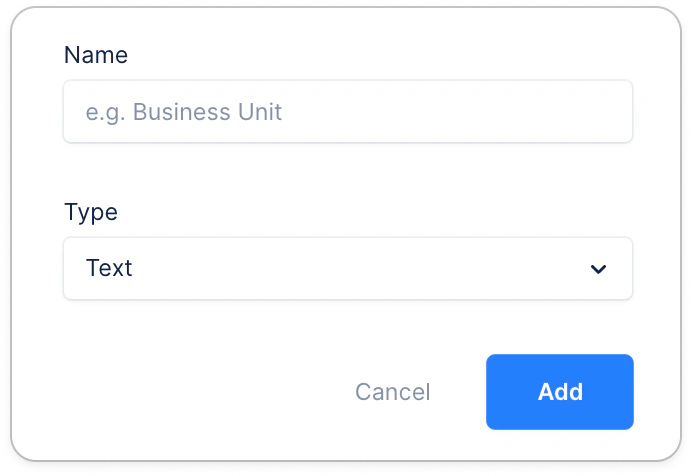
If you need a field that isn’t available or supported in your source of truth, you can create it manually in Upflow. From the same section, scroll down to the end of the available list, and click Add custom field:
- Remove your custom fields (click on the cross next to their name)
- Edit those created on Upflow (rename and update their values)
Special use cases
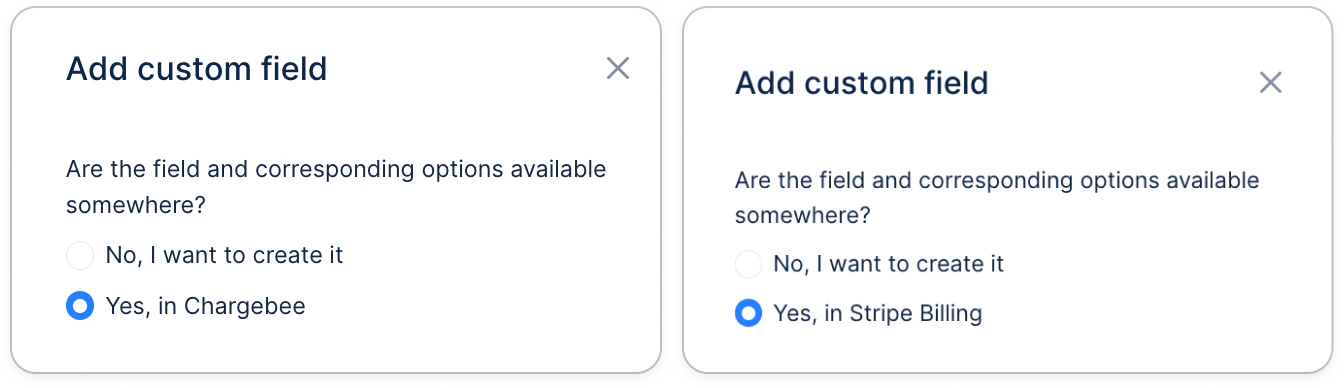
If your field is not available in the dropdown list as shown above, you may have the following option for certain integrations, such as Chargebee or Stripe Billing:- Click “Add field” at the customer level (or invoice level for Stripe);
- Scroll down if needed, and click “Add custom field”;

- Click the option “Yes, in Chargebee” or “Yes, in Stripe Billing”:
- Then add the API or Metadata name displayed in Chargebee or Stripe:
- For example:
- if your Stripe metadata key is billing_method, enter exactly billing_method
- in Chargebee, the API name will start with cf_ which you will need to include in Upflow
- Click “Add”, and don’t forget to save at the bottom of the page.
Edit custom field values
If your custom field is synced from your billing system or Salesforce, they must be edited there directly and won’t be editable in Upflow. If your custom field was created in the Upflow UI, you can edit it at the item level (customer, invoice, credit note, etc.) or in bulk from the list view. ❗ You can only update the values of those created in-app, the others being pulled from your source system. ❗️Custom fields can’t be updated via CSV, only manually or via API.Usage
Your custom fields are now available. Review them in the dedicated sections of your:- Customers details
- Invoices details
- Credit notes details
- Payments details