| Your source system | Details | Contacts | Account managers |
|---|---|---|---|
| Native integration | ❌ | ❌ | ✅ |
| API* | ✅ | ✅ | ✅ |
| Salesforce + native integration | ❌ | ❌ | ❌ |
| Salesforce + API* | ✅ | ❌ | ❌ |
File
Start with creating a compliant spreadsheet with the information you want to update: assigned Workflow or Account manager(s) (i.e., assigned users), contacts who receive your reminders, details relevant to your teammates. 💡 Mandatory and accepted fields are listed below. Save it as a CSV file. You can apply ”;” (semicolons), ”,” (commas) and ”|” (vertical bars) separators.Import process
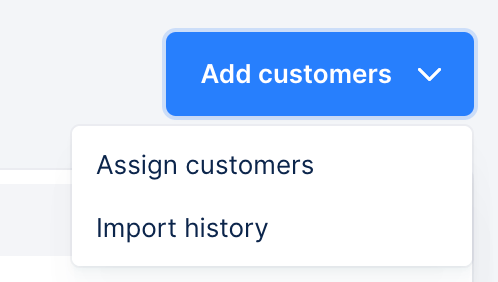
Click Add customers in the top-right corner of your Customers tab and select the Import or Assign customers option.
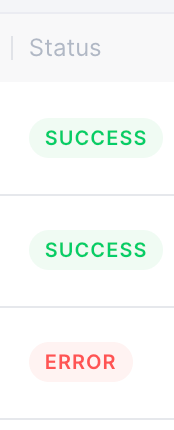
| Error message | Fix |
|---|---|
| Account manager not found; check the email. | Create a member associated with the uploaded email address. |
Columns
Add the following columns to your spreadsheet: their values will populate Upflow fields. Mandatory fields are 🚩 flagged!Details
Create one line per customer, with their details as columns.
| Columns | Details |
|---|---|
| 🚩 Customer name | Identifies this account on Upflow (list, details, analytics…) |
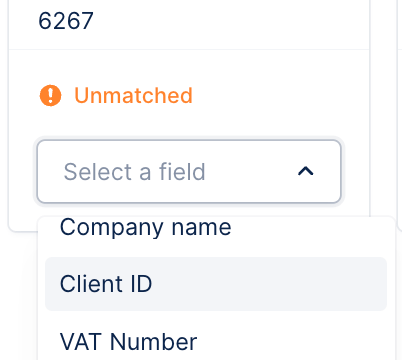
| Customer ID | Your customer external ID (the ID they have in your billing tool), which you can check from their customer page under the Details section. |
| Accounting code | |
| VAT number | |
| Address | |
| Postal code | |
| Town | |
| State/Region | |
| Country |
Groups and entities
If your customers are grouped or have subsidiaries, create additional columns and populate them on the child companies’ lines, indicating the relationship.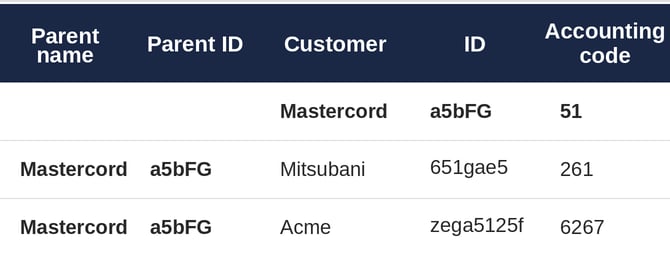
| Columns |
|---|
| 🚩 Parent name |
| 🚩 Parent ID |
Assignment
To assign an Account manager or a Workflow via file upload, add the following columns to your customers’ list.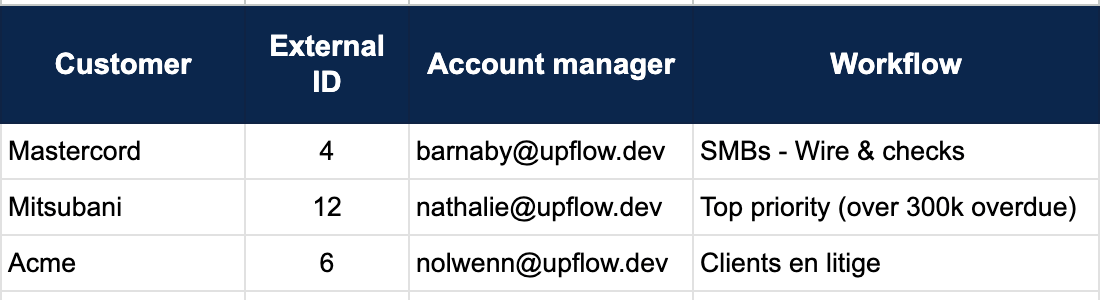
| Columns | Details |
|---|---|
| 🚩 External ID | The ID of the customer on your source system. |
| Account manager | Email address associated to an existing member of your organization with an Account manager role. 💡 Separate emails with a comma to assign several account managers. |
| Workflow* | Name of the workflow assigned to your customer as displayed on your organization. |
CSV assignment - Case sensitive
When assigning workflows or users to your customers via CSV, ensure:- the workflow name is the exact same in your CSV file: this is case-sensitive, and also applies to symbols. Copy the full workflow name in Upflow and paste it in your file.
- the user’s email address contains no capital letters, and is the exact same as in your Users list view. Ensure the user is created first, then copy their email address and paste it in the CSV file.
Custom fields
It is also possible to import customer custom field data using a CSV file. Requirements for custom fields:- The custom field must already exist in Upflow
- Only Upflow-managed custom fields can be imported via CSV
- Synced custom fields from your source of truth can’t be updated by CSV, and must be managed from your system
- Add a column with the exact name of your custom field
- Format the values according to the custom field type (see formatting guide below)
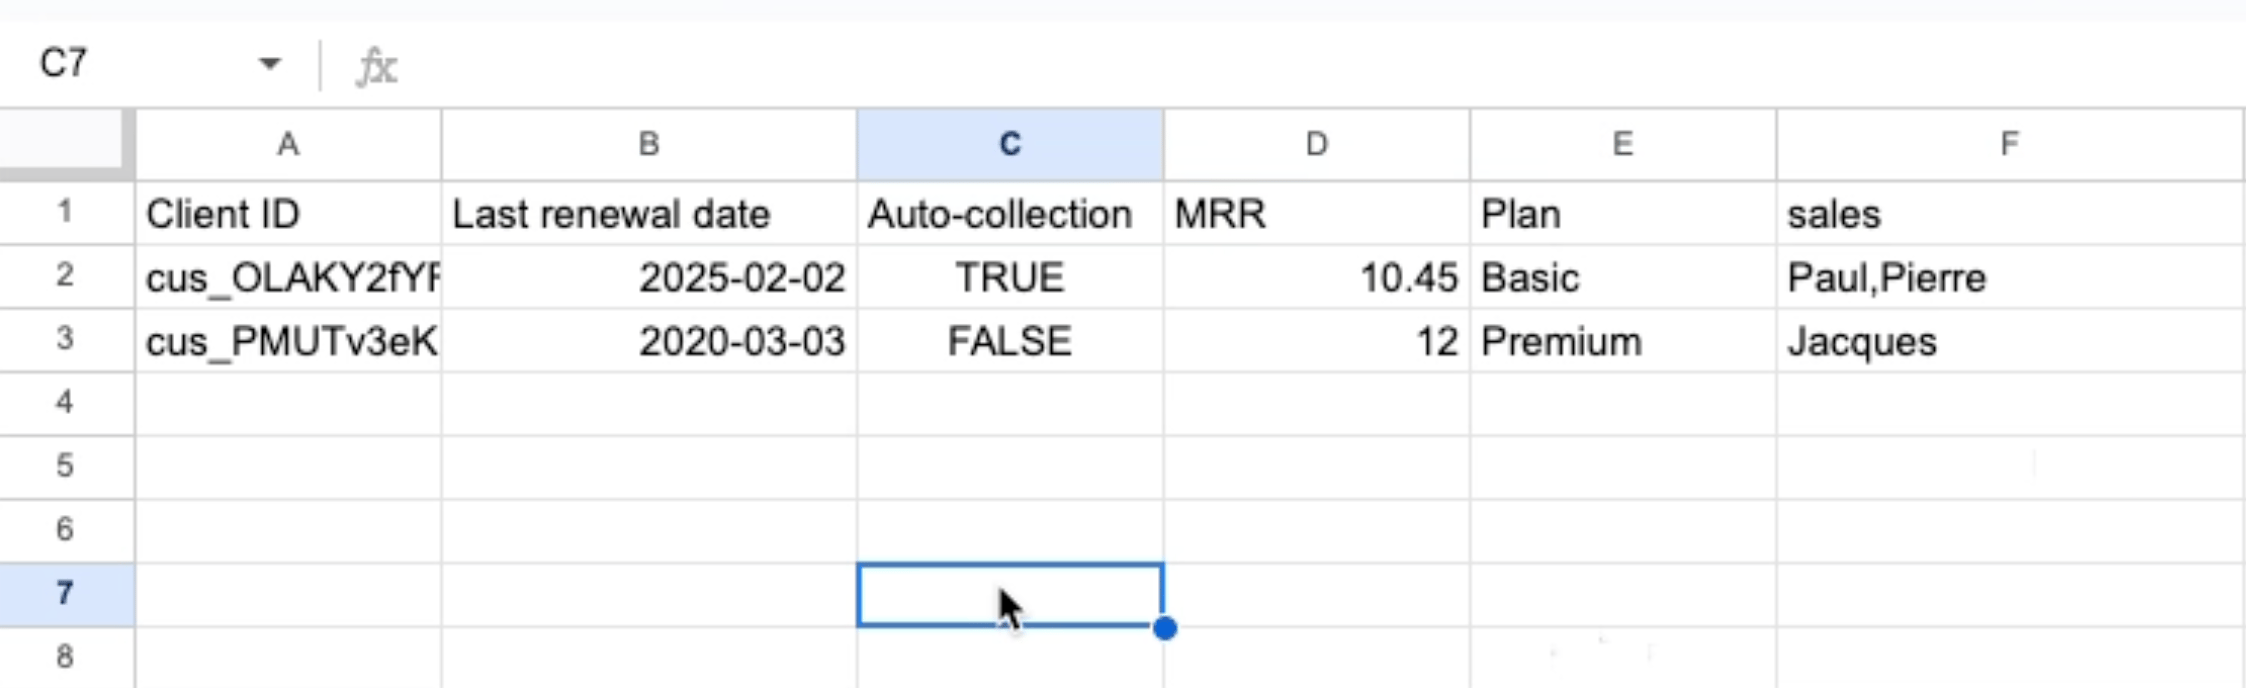
| Custom field type | Format | Example |
|---|---|---|
| Text | Plain text (max 2,000 characters) | “Premium customer” |
| Number | Use period (.) for decimals. Commas not supported. Negative values and decimals are supported. | ”1234.56” |
| Date | YYYY-MM-DD format only | ”2025-12-31” |
| Single-Select | Text value that exactly matches an existing option in Upflow. New values cannot be created via CSV. | Active |
| Multi-Select | Multiple values separated by commas or semicolons. All values must already exist in Upflow. | ”Tag1,Tag2,Tag3” |
| Boolean | true or false (case insensitive) | True, FALSE |
Contacts
Create additional columns to update your customers’ contact information. Duplicate the lines of accounts with multiple contacts (you only need to copy and paste the customers’ ID and/or name).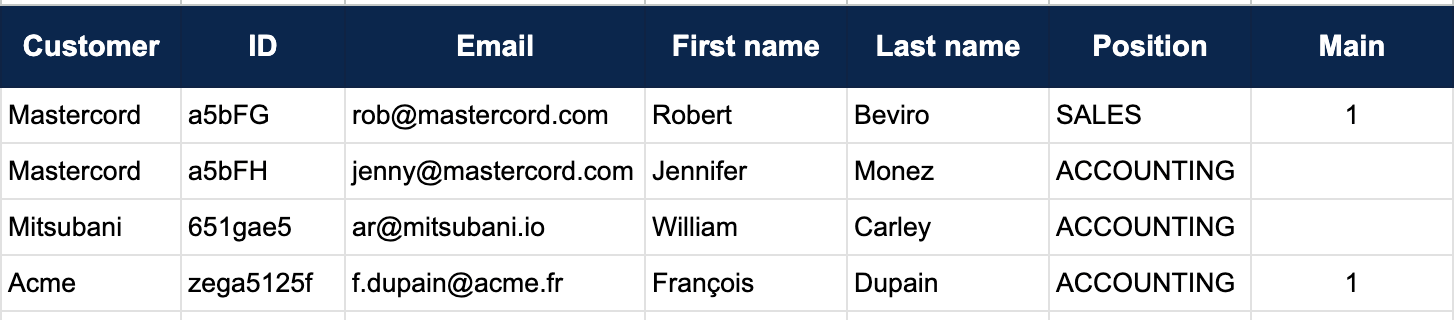
| Columns | Details |
|---|---|
| 🚩 Customer name | |
| 🚩 Client ID (External ID) | Your customer’s ID in your accounting tool. |
| 🚩 Contact email address | |
| First name | |
| Family name | |
| Phone number | |
| Position | Usable when defining your reminders’ recipients. Choose between Accounting, Sales, Purchaser, or Payer. |
| Main contact | Add a “1” in this column on the contact’s line to designate it as your main contact. You can only have one main contact per customer. The latest update overwrites your existing configuration. |