

- Ask your AI client to retrieve Upflow data on demand (debtors, collected amounts, contacts, invoices, payments, …).
- Connect every Upflow organization you have access to with a single authorization.
- Let each person on your team connect their own AI client, scoped to their existing Upflow permissions.
The Upflow MCP server is compatible with most standard AI clients. For security reasons, we whitelist the AI clients allowed to connect. If you’re using an internal AI client or a less common one and the connection fails, contact support@upflow.io and we’ll review whether we can whitelist it.
Before you start
A few things to know:- Admin enables MCP per organization. Once enabled for your org, any user (admin or member) in that org can connect their own AI client.
- OAuth tokens are read-only. Your AI client can query data but cannot create, update, or delete anything in Upflow.
- Scope follows your Upflow permissions. What you can see through MCP is the same as what you can see in the app.
- Multi-org in one connection. A single OAuth grant covers every MCP-enabled organization you have access to. Results come back labelled by organization.
Step 1 - Enable MCP for your organization (admin)
This step is only needed once per organization, and only an admin can do it.
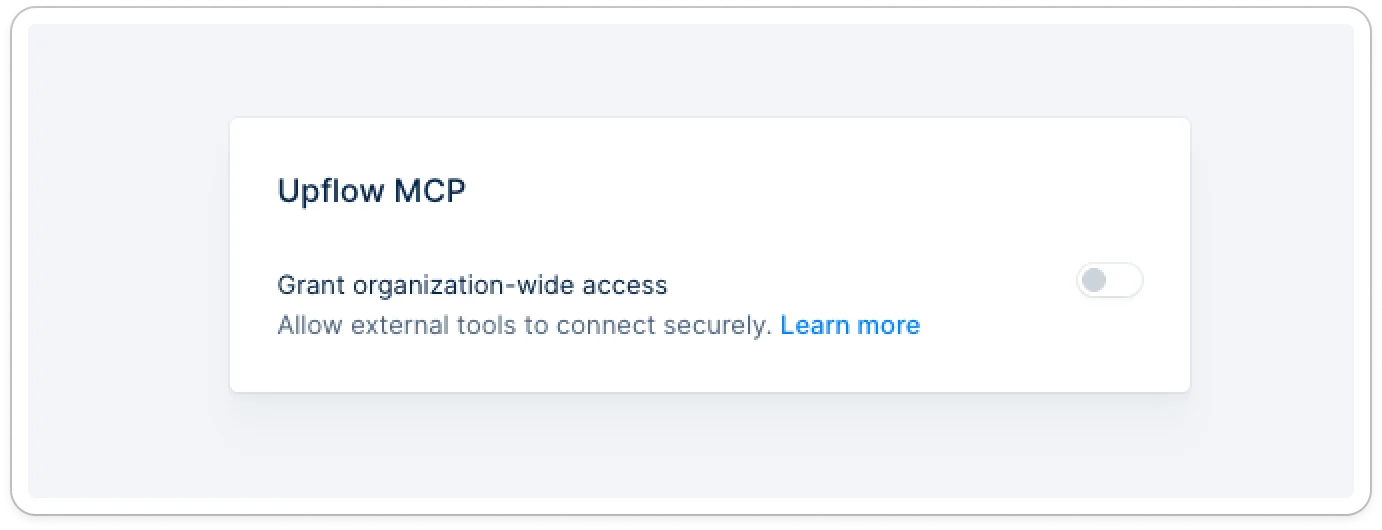
- Toggle Enable MCP Server on.
- Members of your organization can now connect their own AI client. Share the relevant client guide below with them.
Step 2 - Connect your AI client
Pick the guide that matches the AI client you use:- Connect Claude — Claude Desktop and Claude.ai web app.
- Connect ChatGPT — ChatGPT desktop and web app.
Manage your connected AI clients
Every AI client you connect appears in Settings → User → MCP access. For each client you’ll see:- The client’s name, logo, and homepage URL.
- The date the connection was created.
- A Revoke button to disconnect that specific client without affecting any others you’ve connected.
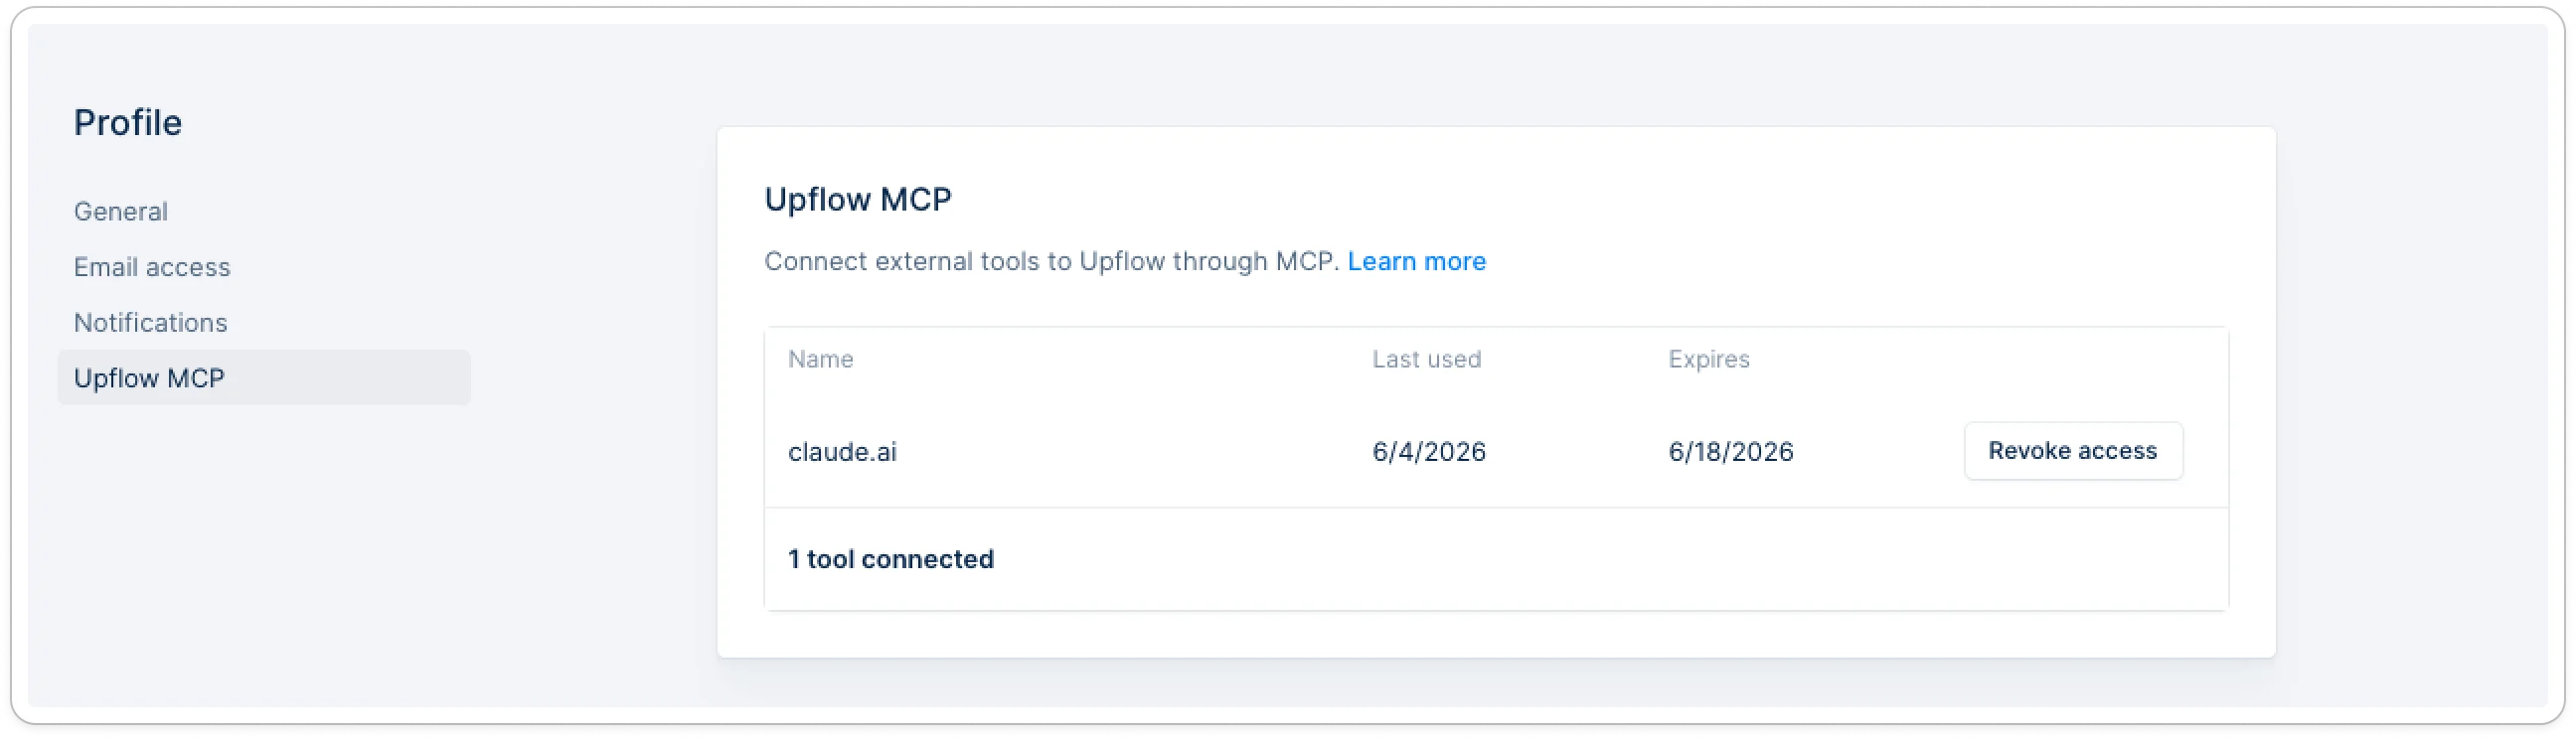
Only you can revoke your own grants. There is no admin-side revoke — admins can only enable or suspend MCP at the organization level.
What your AI client can see
Once connected, your AI client can query data across every MCP-enabled organization you have access to. Access is:- Read-only. No create, update, or delete actions.
- Permission-scoped. Bounded by your existing Upflow permissions in each organization.
- Multi-org by default. Results from queries across organizations come back labelled by organization, so you can run consolidated analyses without switching contexts.