Before you start, make sure an admin has enabled the MCP Server for your organization in Upflow. See Connect Upflow to your AI client for details.
Which path applies to you?
The Claude setup depends on your Claude plan:- Claude Free, Pro, or Max — you can add Upflow as a custom connector yourself. Follow Path A: Personal Claude plan.
- Claude Team or Enterprise — only your organization’s Owner can add a custom connector at the org level. Once they have, you can authorize Upflow from your own Claude account. Follow Path B: Team or Enterprise Claude plan.
Path A: Personal Claude plan
For Claude Free, Pro, and Max users.Step 1 - Open the connector settings in Claude
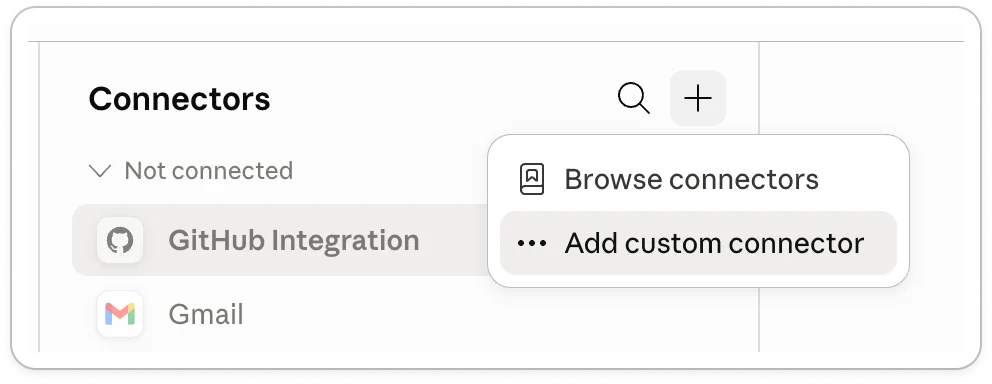
- In Claude, open the Customize tab from the navigation bar
- Click + and select Add custom connector, clicl Click + and select Add custom connector.
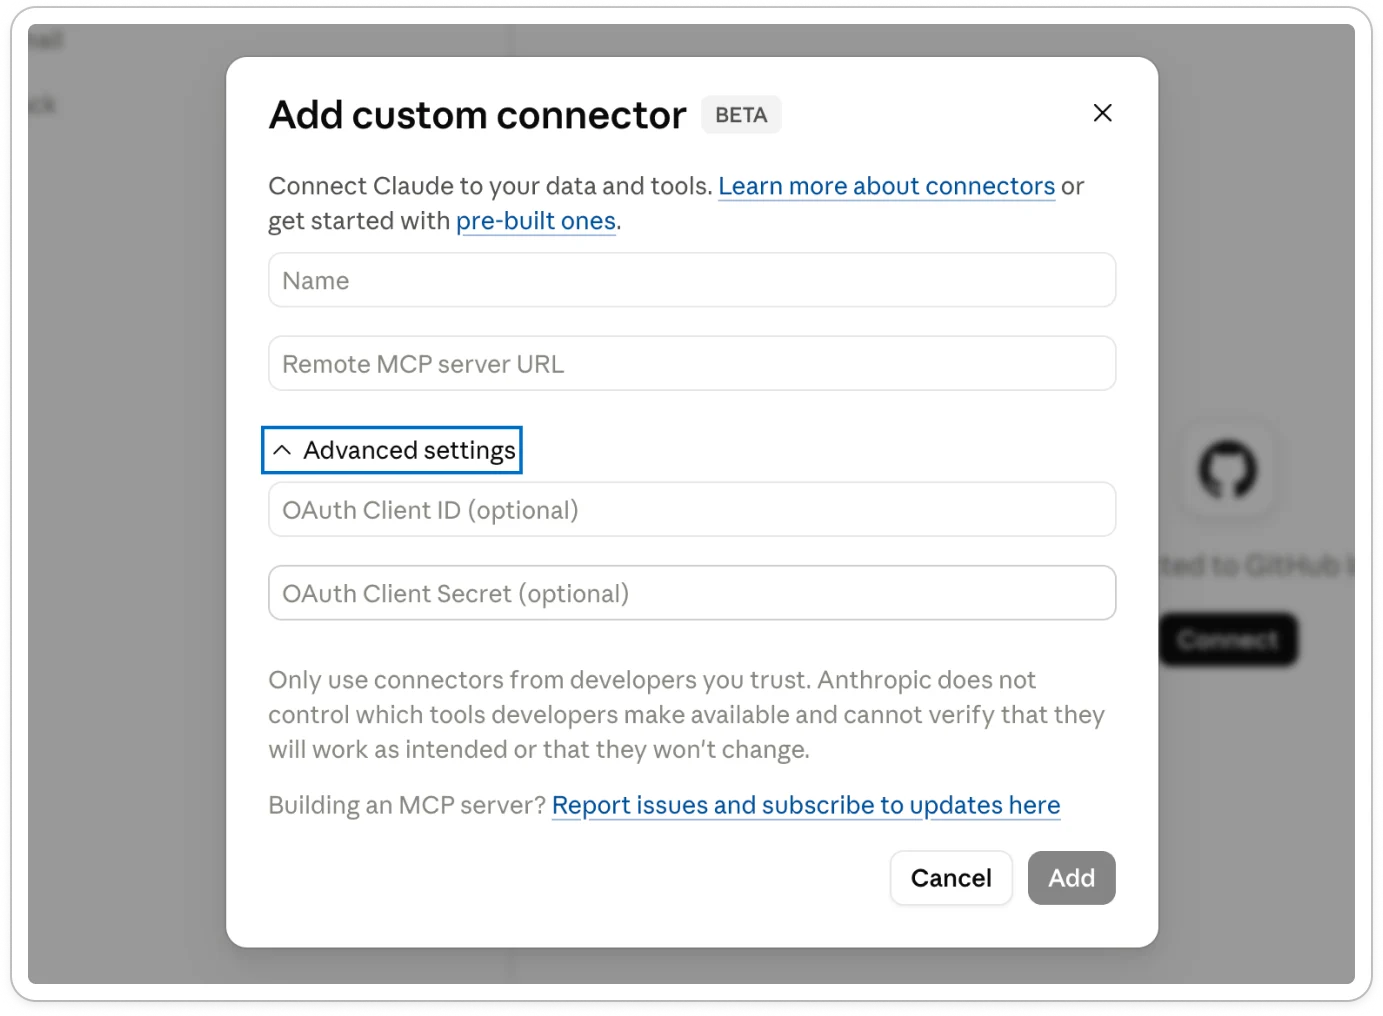
Step 2 - Add Upflow as a connector
Fill in the form:- Name:
Upflow - URL:
https://api.upflow.io/mcp
Step 3 - Connect and authorize
- Back in your connectors list, click Connect next to Upflow.

- If you’re not already signed in to Upflow, you’ll be prompted to log in.
- On the consent page, review the access Upflow is granting and click Authorize. You’ll be redirected back to Upflow with a confirmation.
Step 4 - (Optional) Skip approval prompts
By default, Claude asks for your permission each time it uses a tool to query Upflow. To stop the prompts, select Always allow the first time Claude requests access.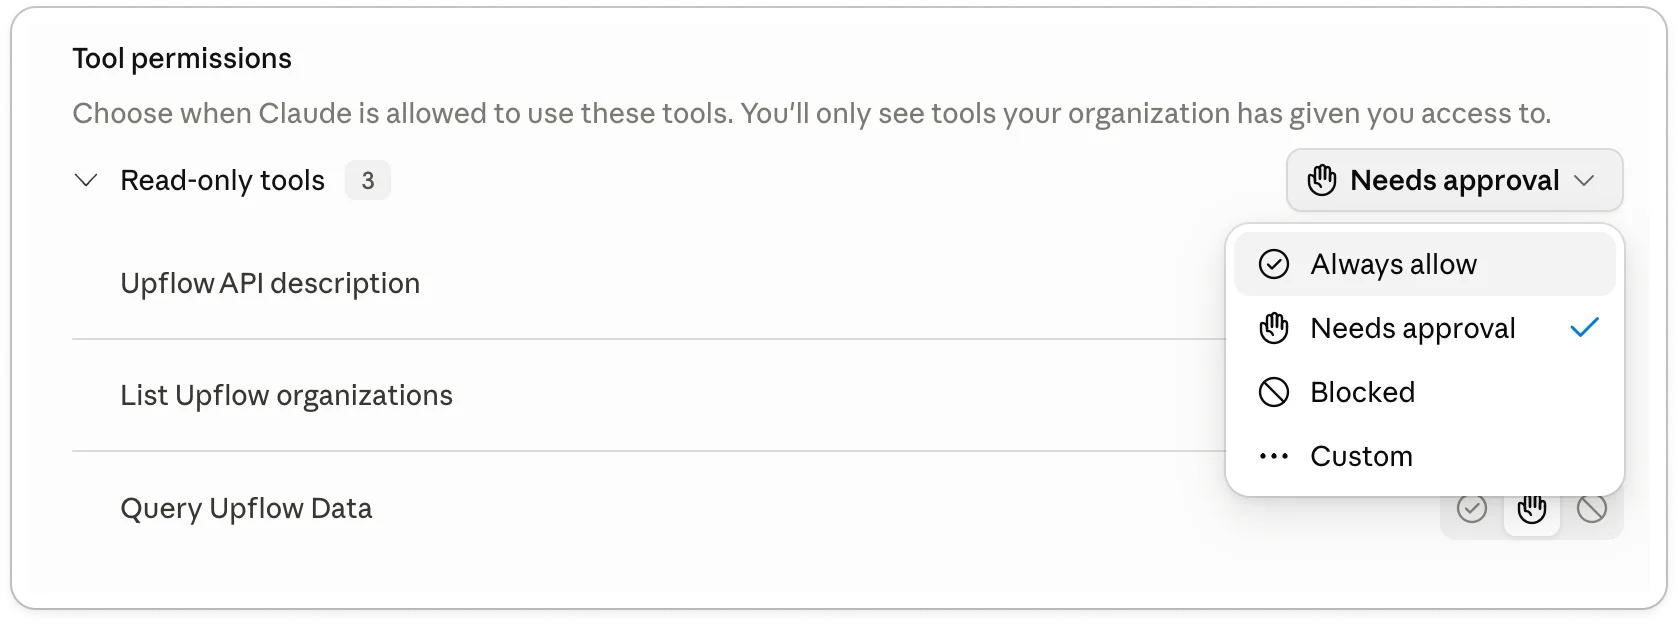
Path B: Team or Enterprise Claude plan
On Team and Enterprise plans, the setup is two-sided: an Owner adds Upflow at the organization level once, then each member connects individually.For the Claude Owner / IT admin
Step 1 - Add Upflow at the organization level
- In Claude, go to Organization settings → Connectors.
- Click Add, hover over Custom, then select Web.
Step 2 - Fill in the form
- Name:
Upflow - URL:
https://api.upflow.io/mcp
For each Claude member
Step 1 - Connect Upflow from your account
- In Claude, open the Customize tab from the navigation bar. Upflow now appears in the list of available connectors.
- Click Connect next to Upflow.
Step 2 - Authorize
- If you’re not already signed in to Upflow, you’ll be prompted to log in.
- On the consent page, review the access Upflow is granting and click Authorize. You’ll be redirected back to Upflow with a confirmation.
Step 3 - (Optional) Skip approval prompts
By default, Claude asks for your permission each time it uses a tool to query Upflow. To stop the prompts, select Always allow the first time Claude requests access.Try it out
Ask Claude anything about your Upflow data. A few prompts to get started:- Top debtors — Who are the top 5 debtors by outstanding balance?
- Recent collections — How much have we collected since the beginning of the month?
- Customer contact — Who is the main contact for [customer name]?