- The logic that carries the workflow: standard or contextual
- When the first action should be triggered
- How often are the actions executed
Invoice-level carrying invoice
If you’re familiar with our customer-level collection process, you know that your workflows are triggered based on what we call the carrying invoice. In invoice-level collection, the carrying invoice is the one triggering the reminders. Regardless of the customer’s other outstanding invoices.Triggers
The logic is the same. Your actions are triggered by a delay you define following the invoice’s issue and/or due date. However, this trigger can be overruled by the workflow minimum contact delay. Let’s take the following example - if the invoice enters the workflow for the first time, being 17 days overdue…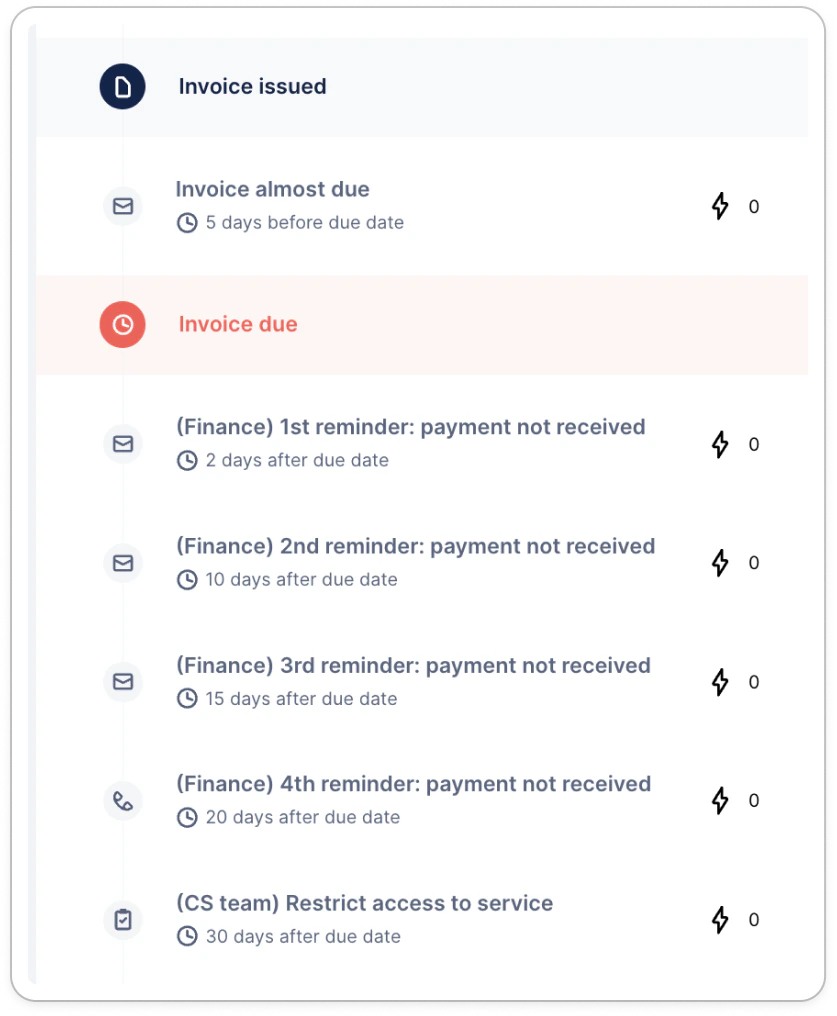

Manage your collection and assign the proper workflows
Workflow Assignment
You can create one or multiple dedicated invoice-level workflows based on your needs. You can automate the invoice-level workflow assignment using our Invoice Smart Rules, based on predefined conditions.Creating and assigning workflows
Navigate to the “Workflows” section and click on “Create Invoice Workflow” to begin configuration. Initially, consider setting emails as manual until the workflow aligns with your requirements and assignments are finalized.
Default workflow setting
Marking an invoice workflow as “Default” ensures it’s automatically assigned to every new invoice imported into Upflow.
Double level of communication
Avoiding Duplication
Ensure that your customers aren’t simultaneously assigned to a customer-level workflow to prevent overlapping communications. This separation helps maintain clarity and prevents redundant reminders. If you wish to keep both levels of collection, we recommend to adapt each of their content.Main collection: Invoice level
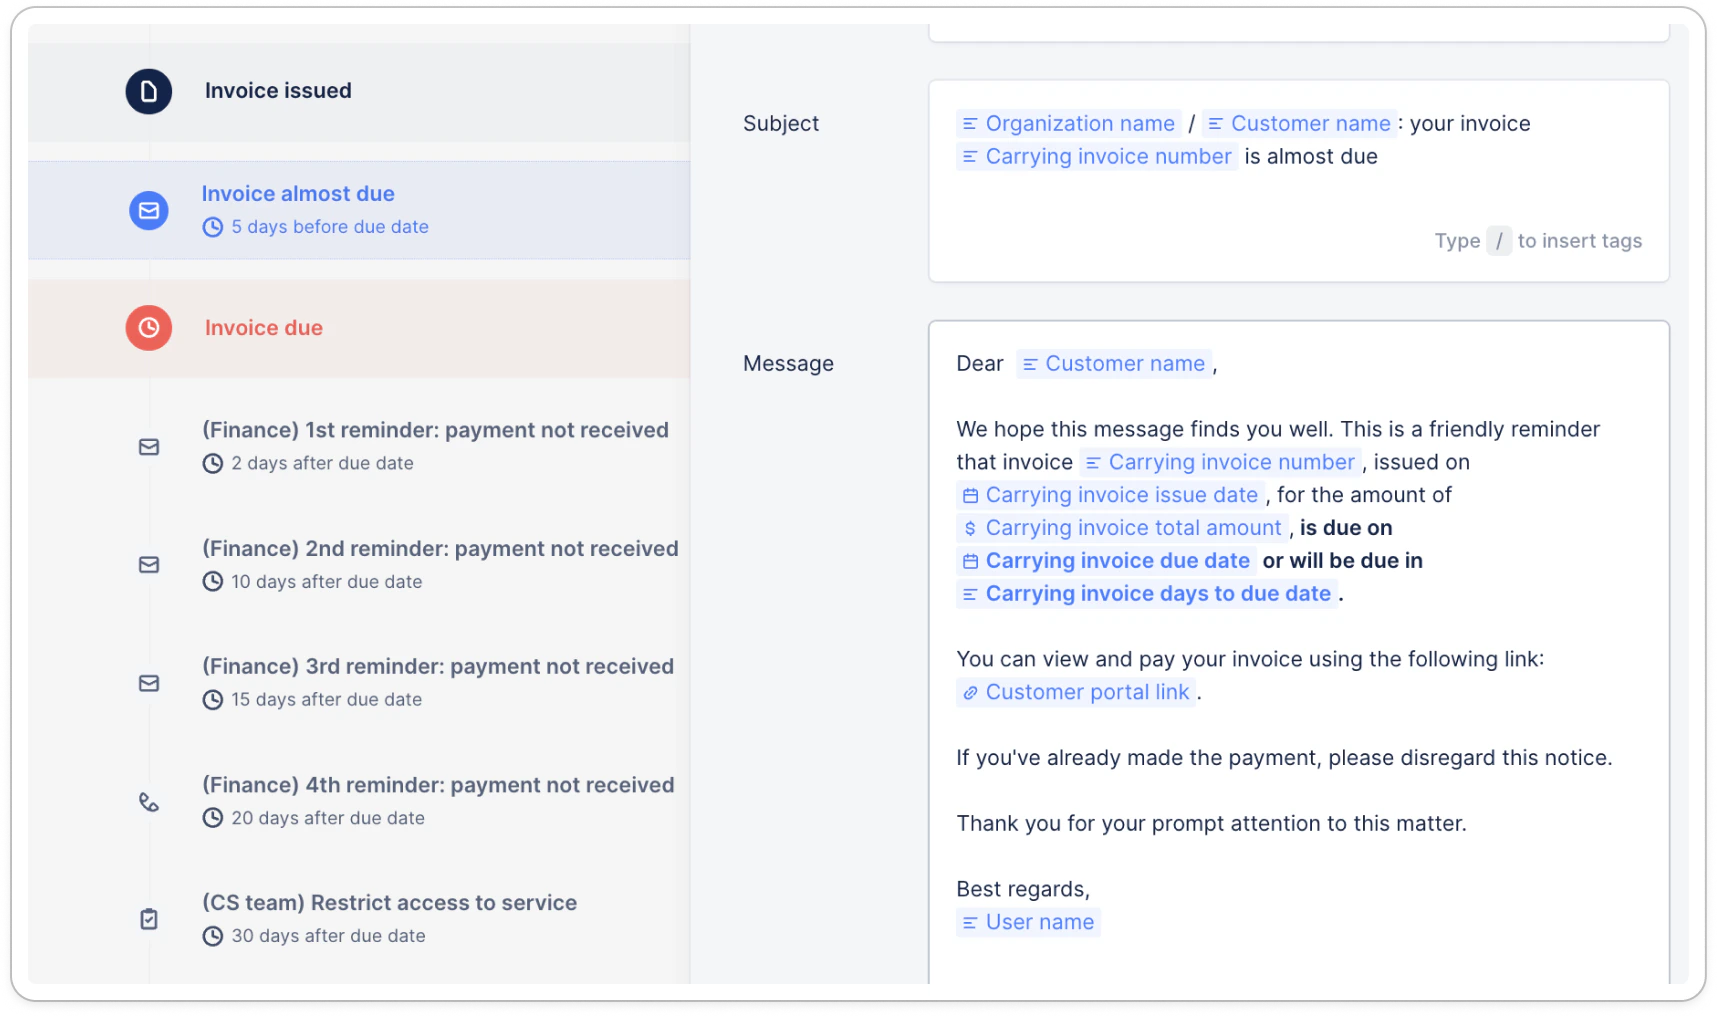
If you want the main collection to be at the invoice level, while keeping some communication at the customer level, ensure that invoice and customer actions don’t repeat themselves. Adapt the tags you use in each collection level to avoid duplicates. Adapt also the triggers to avoid spamming your customers. Tailored Communication: When designing your invoice-level reminders, emphasize fields related to the specific invoice. For example, your initial reminder template might include: Additionally, consider sending pre-due date reminders to notify clients of upcoming due dates
Main collection: Customer level
But you could also want to keep your main communication at the customer-level, while sending one specific reminder at the invoice level when it’s almost due, or just overdue. In that case, create an invoice level workflow, with only one reminder before the due date :
Your invoice level workflow fields
Responsibility and sender details
You can replicate your existing configuration regarding who is responsible for sending reminders and the designated sender. For instance, the group Cash Collectors can be assigned as responsible parties, and the sender’s profile can be set to a specific team member* or an alias: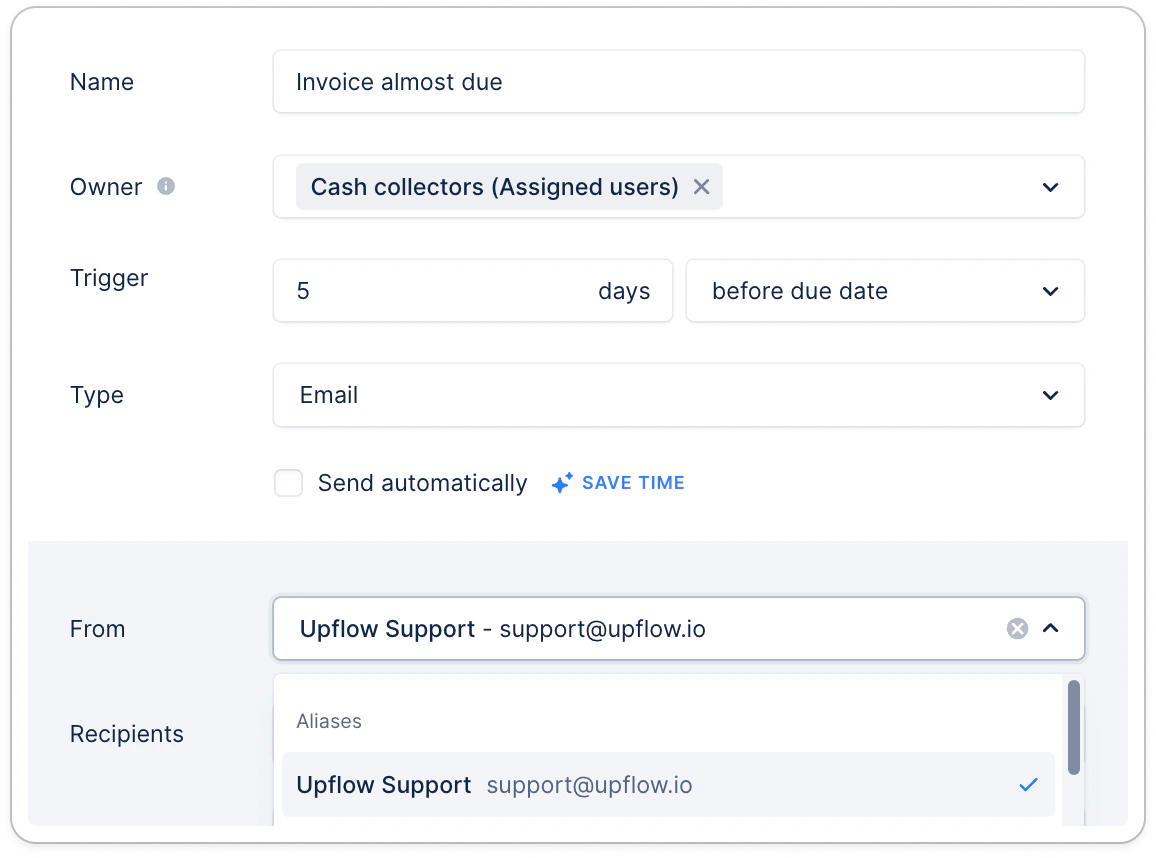
Assigning invoice workflows
Bulk assignment to invoices
Go to the Invoices list view, select all due, not due, and disputed invoices by checking the box in the “Number” column. Click on the blue link at the top right to select all relevant invoices. Then, choose Actions > Assign a Workflow and select the appropriate workflow.Unassign customer workflows
To prevent duplicate reminders, and if you wish to do a full invoice level collection, then we recommend unassigning workflows at the customer level. Head to the Customers list view, select all customers, and choose Actions > Assign a Workflow > select “No Workflow.” This update may take a few minutes, depending on the number of customers. Refreshing and Monitoring
After making these changes, refresh your browser to ensure all updates are applied. Head to the Actions list view, “All” or “To-Do” tab to view actions for each invoice based on the new workflow. As a reminder, manual actions will be displayed in the To-do, while both manual and automatic will be in the All tab.Pause the invoice collection
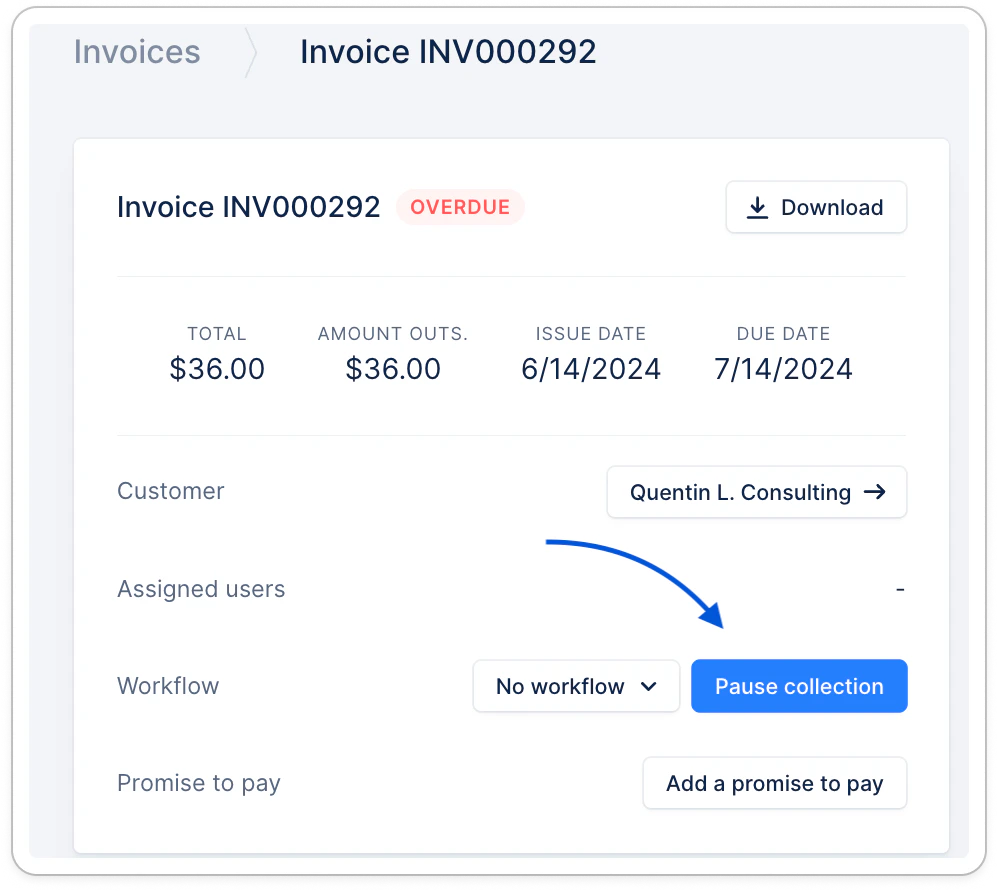
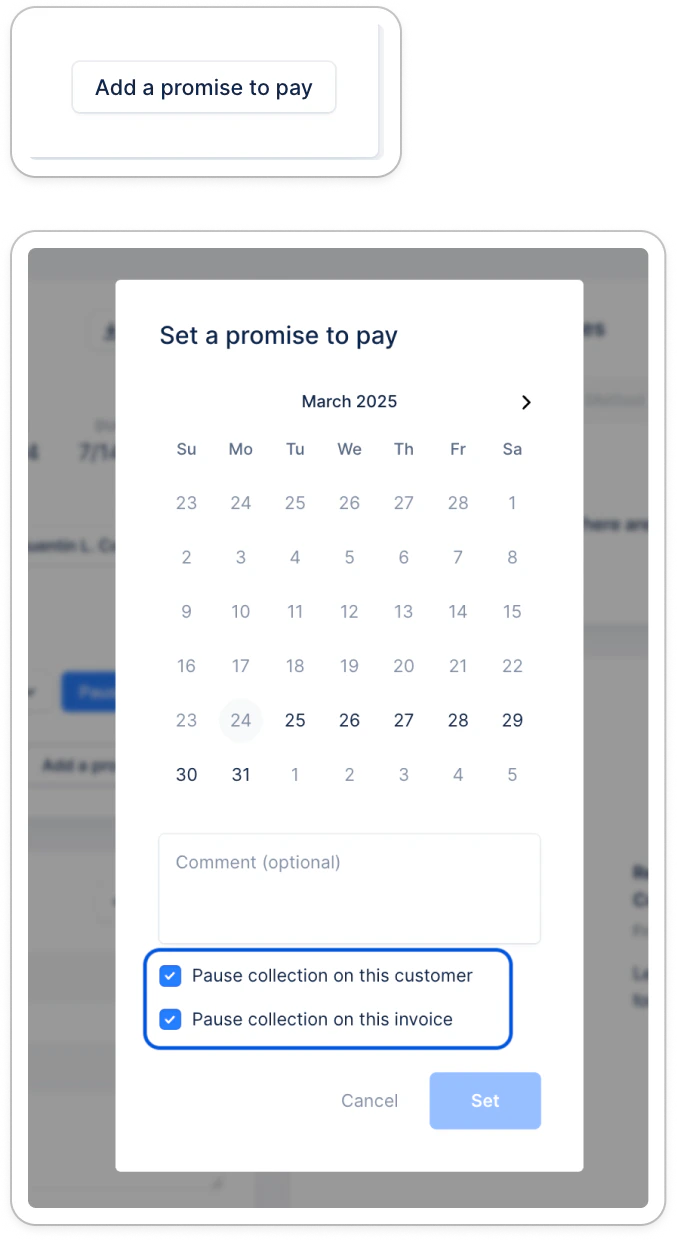
You can pause the collection of an invoice at any point. It can be done directly from the invoice’s detail page, from the dedicated button: