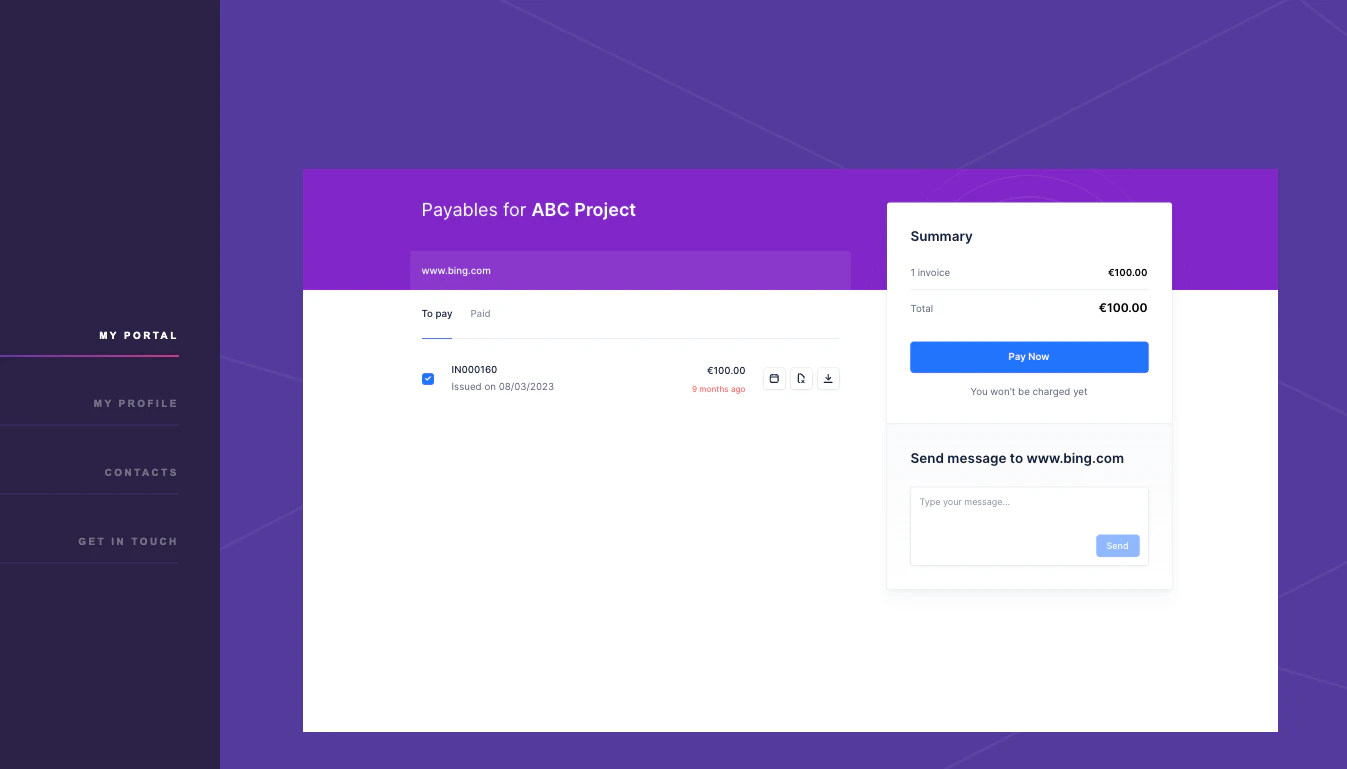
- Enhanced customer experience: Your customers can view invoices, make payment and track payment statuses at their convenience, 24/7 securely within your website.
- Personalized branding: Customize the portal to reflect your company’s branding, ensuring a seamless and professional experience for your clients.
Setting up the embedded customer portal
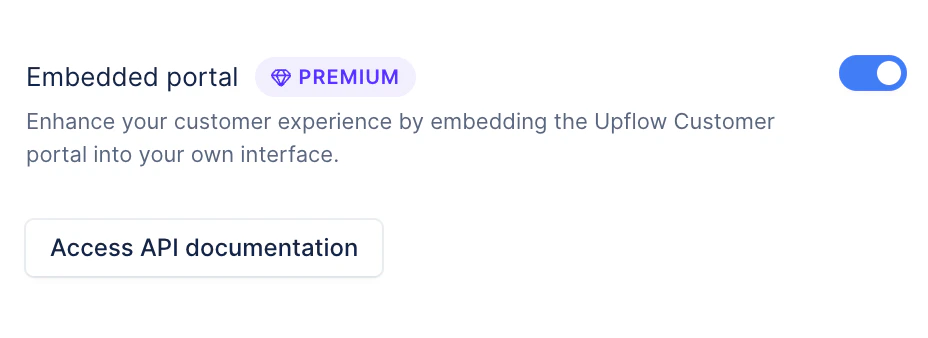
Step 1: Enable the embedded customer portal
- Ensure that the embedded customer portal is enabled from the settings section.
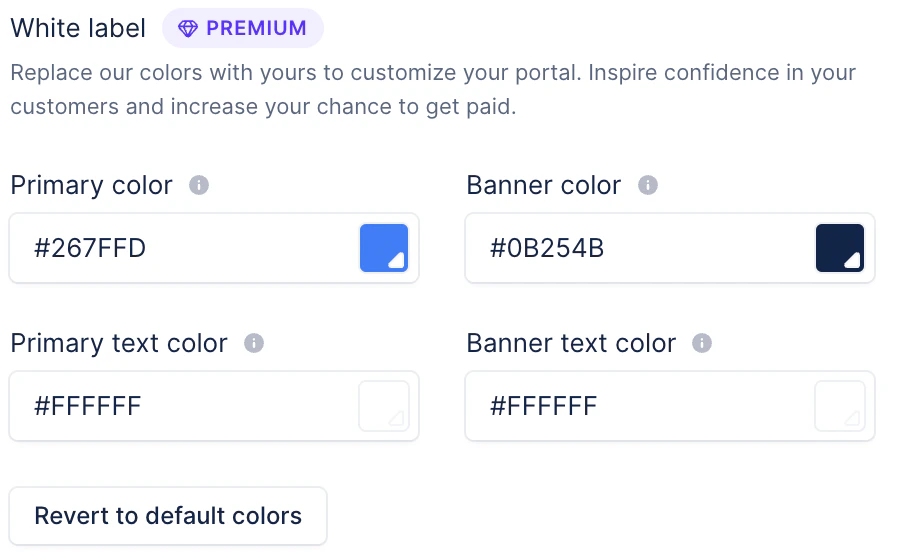
Step 2: Customize your customer portal
- Design your customer portal to align with your company’s branding.
Step 3: Access Upflow’s API documentation
Refer to Upflow’s API documentation to access the endpoint for generating your customer’s URL.- It is highly recommended to include your customer’s username as an attribute in the API request for audit purposes.
- The embedded URL should be unique for each customer and must not be stored (only cached temporarily if needed).
- The call to retrieve the portal URL must strictly be made from the backend (not the frontend) as it utilises the client’s API secret.
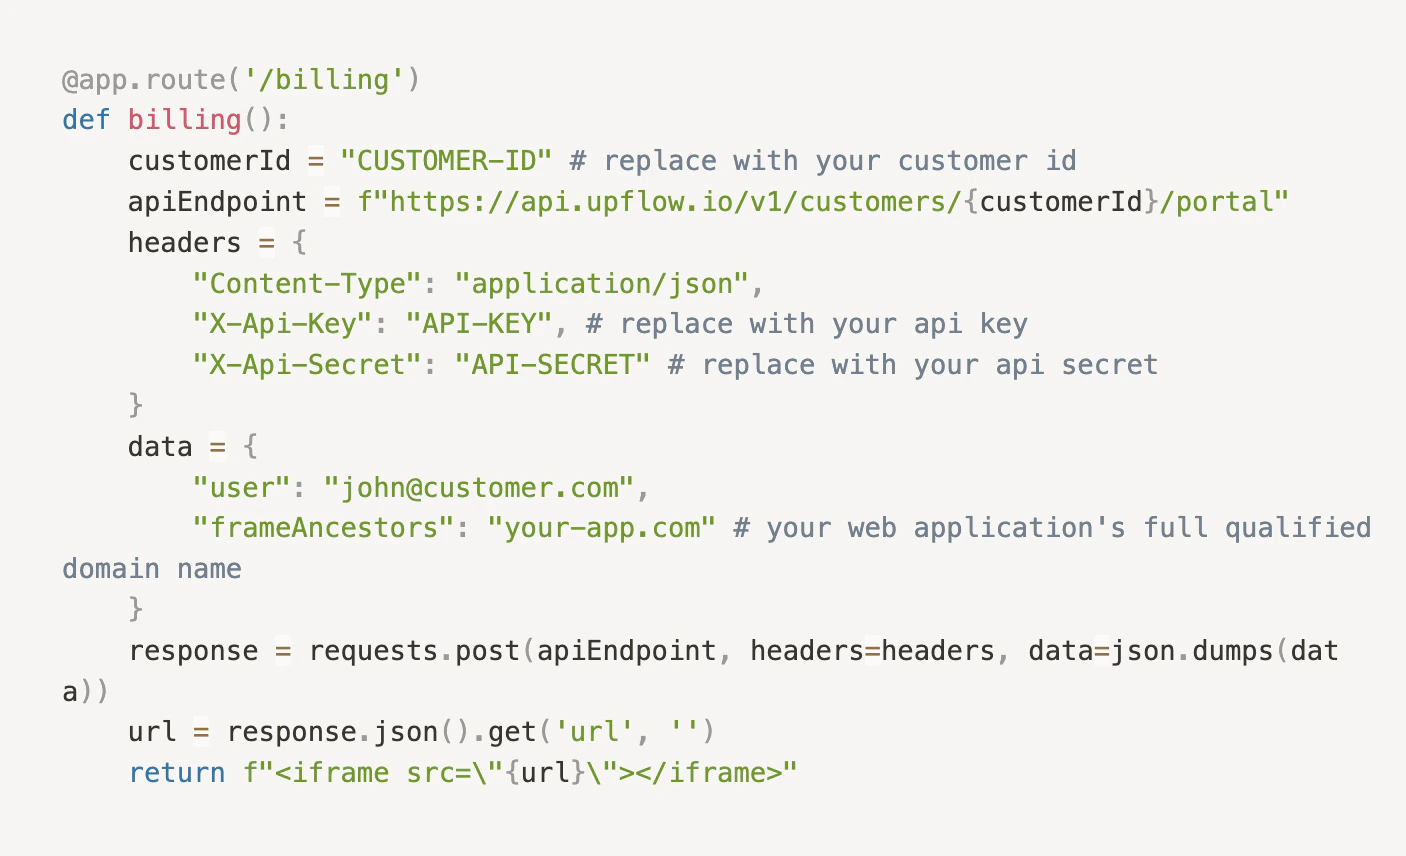
Step 4: Embed the portal URL in your desired website
- Once the URL is generated, use it within the iframe on your desired website.
Step 5: Go live with your embedded customer portal
- Your embedded customer portal is now live and ready for use. You can invite your customers to make use of the embedded customer portal.