> ## Documentation Index
> Fetch the complete documentation index at: https://docs.upflow.io/llms.txt
> Use this file to discover all available pages before exploring further.
# Connect HubSpot to Upflow
> Connect the HubSpot CRM to Upflow: authorize access, map a shared identifier between HubSpot companies and your customers, and choose which data to sync.
Connecting HubSpot to Upflow brings your CRM data into your collections process. Once connected, Upflow keeps your customers enriched with the information your team relies on to get paid — customer custom fields and account context — and can push your AR data back to HubSpot so your commercial team always sees where each account stands.
The HubSpot integration is currently in **beta**. [Contact our support team](/en-us/essentials/get-started/contact-our-support-team) to request access.
In this article, you'll find:
* How to connect HubSpot to Upflow
* How to set up a shared identifier so Upflow matches the right customers
* Which data you can sync, and where to configure it
## Before you start
* The user setting up the integration must be an **admin** in both HubSpot and Upflow.
* If you manage several Upflow organizations, you can connect them all to the same HubSpot account.
* HubSpot **companies** map to Upflow **customers**.
## How to connect HubSpot with Upflow
You'll set up the integration from the [CRM section of your Upflow settings](https://app.upflow.io/organization/-/settings/crm).
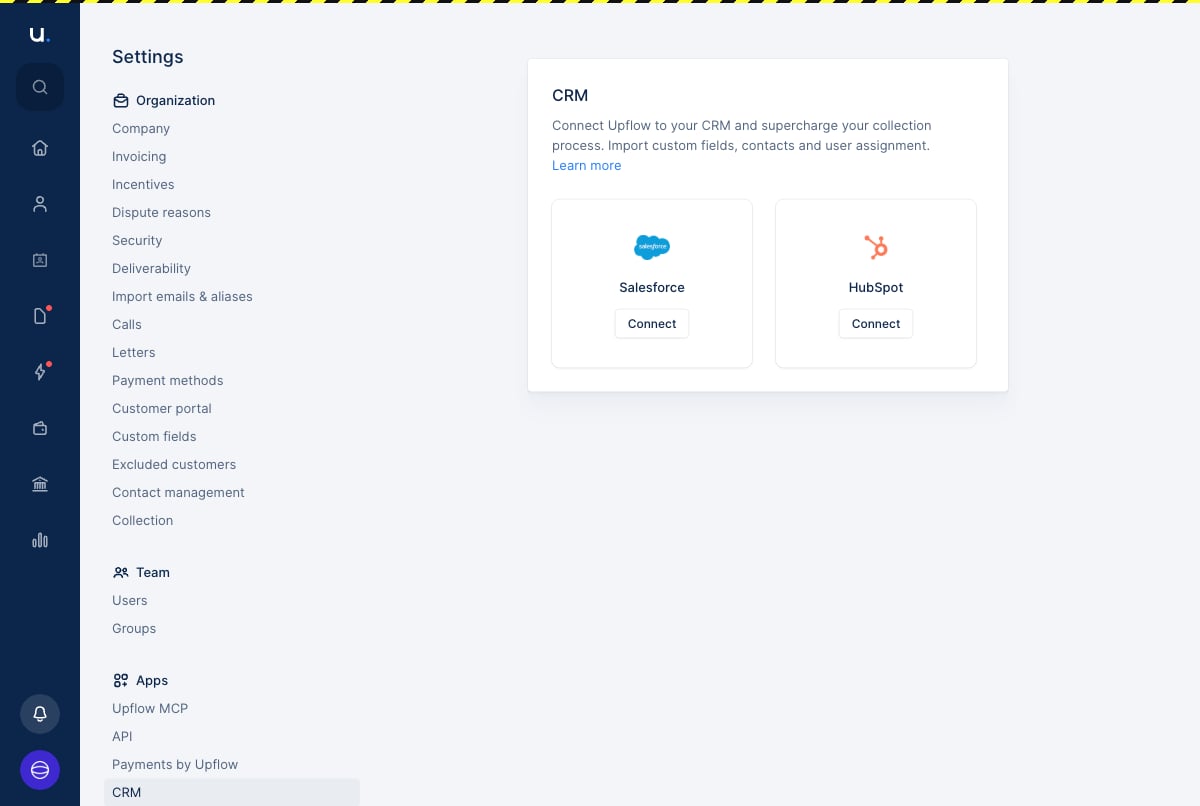
1. From the [**CRM**](https://app.upflow.io/organization/-/settings/crm) settings page, find the **HubSpot** card and click **Connect**.
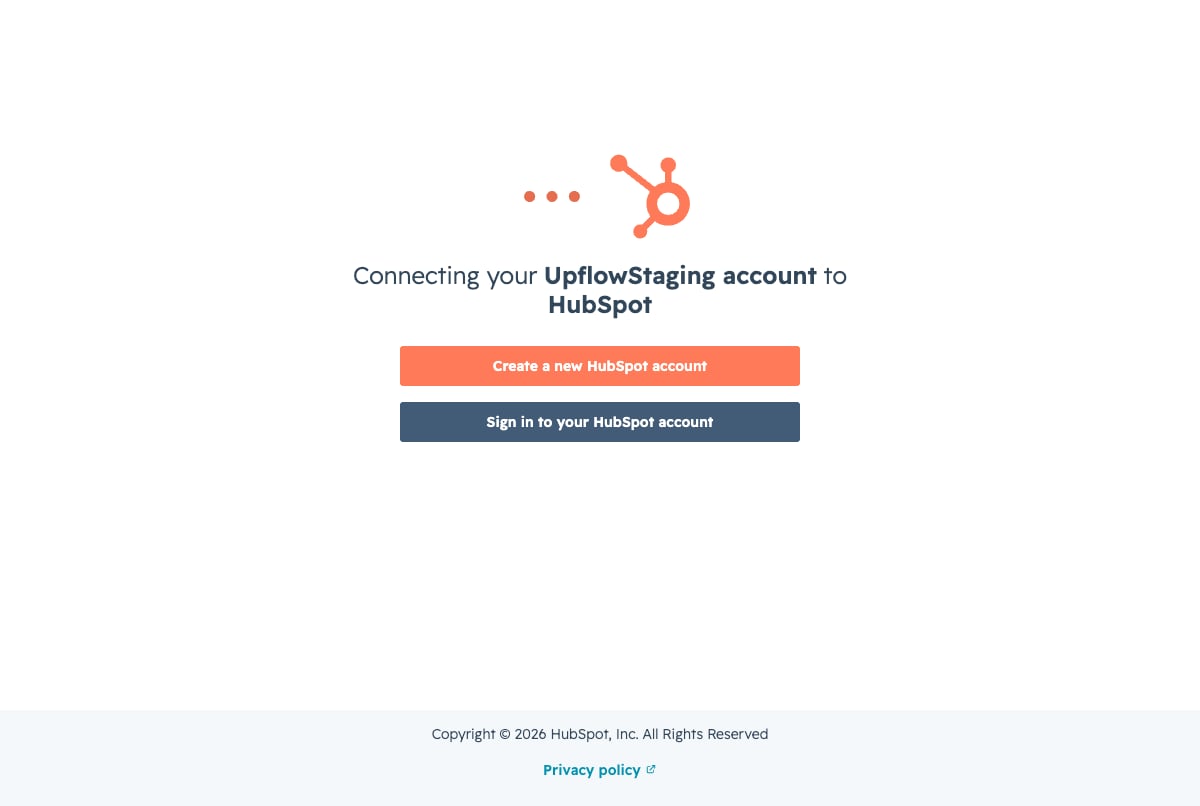
 2. You're taken to HubSpot to authorize the connection. Sign in to your HubSpot account (or create one), then approve the access Upflow requests.
 Upflow asks for permission to **read and write your HubSpot companies** and to **manage company properties**. These are needed to import your data into Upflow and to write your AR data back to HubSpot.
3. Once you approve, HubSpot sends you back to Upflow to finish the setup.
## Setting up a shared identifier
Right after you authorize, the onboarding asks you to set up a **shared identifier** — this comes first, because it's what lets Upflow match the right HubSpot company to the right customer. It's a value that identifies the same customer across HubSpot, Upflow, and your billing tool (NetSuite, QuickBooks, Chargebee, Stripe Billing, Xero, Zuora, and so on).
A **1-to-1 mapping** is required between your billing tool customers and your HubSpot companies. A text property is the most reliable type for the identifier.
### Common identifier scenarios
#### Option 1: Using the HubSpot identifier (company ID)
Here, your HubSpot companies are synchronised into your billing tool.
* Each company in HubSpot has a unique **company ID**, which looks like `424327409854`.
* You can find it in the URL of a company page in HubSpot.
* Make sure it exists in **your billing tool** as a custom field, and in **Upflow** as a customer custom field (import it if needed from the custom fields section).
* **Field mapping:** select the HubSpot company ID on the HubSpot side and the matching field on your billing tool side.
#### Option 2: Using your billing tool identifier (e.g. NetSuite Id)
Here, your billing tool customers are synchronised into HubSpot.
* The identifier — for example a **NetSuite Id**, formatted like `285` — is unique to each customer in your billing tool.
* Make sure it exists in **HubSpot** as a company property, and in **Upflow** on the customer.
* **Field mapping:** select your billing tool's ID as the shared identifier on both sides.
#### Option 3: Using another identifier
Here, your billing tool and HubSpot are not synchronised together.
You'll choose or create a dedicated shared identifier (for example an app-specific ID or a company registration number), make sure it exists in both HubSpot and your billing tool, and [import it into Upflow](https://app.upflow.io/organization/-/settings/custom-fields).
### Step by step
1. **Choose the identifier.** Pick one value that is the same for the same customer in both systems, **unique** (no duplicates), and **stable** over time. A text field usually works best.
2. **Add the field on both sides.** In **HubSpot**, create or select a company property (e.g. *Other ID*). In your **billing tool**, create or select the equivalent field on the customer.
3. **Fill the identifier in both systems.** Populate it manually (small volumes) or via API/automation (recommended at scale).
4. **Make it available in Upflow.** Sync both fields from your [**Custom fields** settings](https://app.upflow.io/organization/-/settings/custom-fields), at the customer level.
5. **Map the fields.** In Upflow, map the identifier field on your **billing tool** side to the matching property on the **HubSpot** side. You can update this at any time from your [**Custom fields** settings](https://app.upflow.io/organization/-/settings/custom-fields).
**Common errors preventing the match for some customers:**
* Missing values in one or both systems → no match
* Duplicates → ambiguous match
* Formatting differences (spaces, leading zeros, casing) → mismatch
## Configure the integration
Next, a short **Configure your HubSpot integration** step lets you choose what to sync in each direction. When you're done, Upflow runs an initial synchronisation and then keeps everything up to date automatically.
1. **Import into Upflow.** Importing HubSpot company custom properties is enabled automatically and can't be turned off. You choose exactly which properties to bring in from your Custom field settings.
Upflow asks for permission to **read and write your HubSpot companies** and to **manage company properties**. These are needed to import your data into Upflow and to write your AR data back to HubSpot.
3. Once you approve, HubSpot sends you back to Upflow to finish the setup.
## Setting up a shared identifier
Right after you authorize, the onboarding asks you to set up a **shared identifier** — this comes first, because it's what lets Upflow match the right HubSpot company to the right customer. It's a value that identifies the same customer across HubSpot, Upflow, and your billing tool (NetSuite, QuickBooks, Chargebee, Stripe Billing, Xero, Zuora, and so on).
A **1-to-1 mapping** is required between your billing tool customers and your HubSpot companies. A text property is the most reliable type for the identifier.
### Common identifier scenarios
#### Option 1: Using the HubSpot identifier (company ID)
Here, your HubSpot companies are synchronised into your billing tool.
* Each company in HubSpot has a unique **company ID**, which looks like `424327409854`.
* You can find it in the URL of a company page in HubSpot.
* Make sure it exists in **your billing tool** as a custom field, and in **Upflow** as a customer custom field (import it if needed from the custom fields section).
* **Field mapping:** select the HubSpot company ID on the HubSpot side and the matching field on your billing tool side.
#### Option 2: Using your billing tool identifier (e.g. NetSuite Id)
Here, your billing tool customers are synchronised into HubSpot.
* The identifier — for example a **NetSuite Id**, formatted like `285` — is unique to each customer in your billing tool.
* Make sure it exists in **HubSpot** as a company property, and in **Upflow** on the customer.
* **Field mapping:** select your billing tool's ID as the shared identifier on both sides.
#### Option 3: Using another identifier
Here, your billing tool and HubSpot are not synchronised together.
You'll choose or create a dedicated shared identifier (for example an app-specific ID or a company registration number), make sure it exists in both HubSpot and your billing tool, and [import it into Upflow](https://app.upflow.io/organization/-/settings/custom-fields).
### Step by step
1. **Choose the identifier.** Pick one value that is the same for the same customer in both systems, **unique** (no duplicates), and **stable** over time. A text field usually works best.
2. **Add the field on both sides.** In **HubSpot**, create or select a company property (e.g. *Other ID*). In your **billing tool**, create or select the equivalent field on the customer.
3. **Fill the identifier in both systems.** Populate it manually (small volumes) or via API/automation (recommended at scale).
4. **Make it available in Upflow.** Sync both fields from your [**Custom fields** settings](https://app.upflow.io/organization/-/settings/custom-fields), at the customer level.
5. **Map the fields.** In Upflow, map the identifier field on your **billing tool** side to the matching property on the **HubSpot** side. You can update this at any time from your [**Custom fields** settings](https://app.upflow.io/organization/-/settings/custom-fields).
**Common errors preventing the match for some customers:**
* Missing values in one or both systems → no match
* Duplicates → ambiguous match
* Formatting differences (spaces, leading zeros, casing) → mismatch
## Configure the integration
Next, a short **Configure your HubSpot integration** step lets you choose what to sync in each direction. When you're done, Upflow runs an initial synchronisation and then keeps everything up to date automatically.
1. **Import into Upflow.** Importing HubSpot company custom properties is enabled automatically and can't be turned off. You choose exactly which properties to bring in from your Custom field settings.
 2. **Choose what to export from Upflow.** Turn on the export to send your AR data back to HubSpot, then map each Upflow field to the HubSpot company property it should update.
 For the full detail of each direction, see [Import HubSpot data](/en-us/integrations/hubspot/import-data) and [Export Upflow data to HubSpot](/en-us/integrations/hubspot/export-data).
## Frequently asked questions
### How often does HubSpot data sync with Upflow?
After the initial synchronisation, Upflow keeps your data current automatically, picking up changes made in HubSpot on a regular basis.
### What happens if I disconnect HubSpot?
Disconnecting removes the custom fields imported from HubSpot. Reconnecting starts a fresh synchronisation.
For the full detail of each direction, see [Import HubSpot data](/en-us/integrations/hubspot/import-data) and [Export Upflow data to HubSpot](/en-us/integrations/hubspot/export-data).
## Frequently asked questions
### How often does HubSpot data sync with Upflow?
After the initial synchronisation, Upflow keeps your data current automatically, picking up changes made in HubSpot on a regular basis.
### What happens if I disconnect HubSpot?
Disconnecting removes the custom fields imported from HubSpot. Reconnecting starts a fresh synchronisation.