> ## Documentation Index
> Fetch the complete documentation index at: https://docs.upflow.io/llms.txt
> Use this file to discover all available pages before exploring further.
# Smart Rules - Assignment Best Practice
> Bulk update existing customers and invoices when creating or editing a smart rule in Upflow, so the new logic applies retroactively to records already in the platform.
Before looking at specific use cases, it’s essential to note that you will need to update your existing customers or invoices when creating/updating a rule, to ensure they’re aligned with it.
You can refer to our [main article](/en-us/collection-and-collaboration/smart-rules/smart-rules) for more insights on what smart rules are and how they work.
## Manually bulk update customers/invoices
If you created or updated a rule in Upflow, you must take into account that it’ll apply only when the rule’s trigger (and conditions) are met. For existing customers (or invoices), you must ensure the following option is ticked:
 Wait for the sync to happen (delay depends on the volume to update).
Then go to your Customers or invoices list view, refresh and check the data.
#### Rule update or manual application update
If you just edited an existing and active rule, and wish to apply this new behavior to existing objects (customers or invoices), we recommend you deactivate the rule, and reactivate it while ticking the option “Apply to all existing objects matching the rule’s conditions” (screenshot above).
Wait for the sync to happen (delay depends on the volume to update).
Then go to your Customers or invoices list view, refresh and check the data.
### Simple rule to assign a workflow
Wait for the sync to happen (delay depends on the volume to update).
Then go to your Customers or invoices list view, refresh and check the data.
#### Rule update or manual application update
If you just edited an existing and active rule, and wish to apply this new behavior to existing objects (customers or invoices), we recommend you deactivate the rule, and reactivate it while ticking the option “Apply to all existing objects matching the rule’s conditions” (screenshot above).
Wait for the sync to happen (delay depends on the volume to update).
Then go to your Customers or invoices list view, refresh and check the data.
### Simple rule to assign a workflow
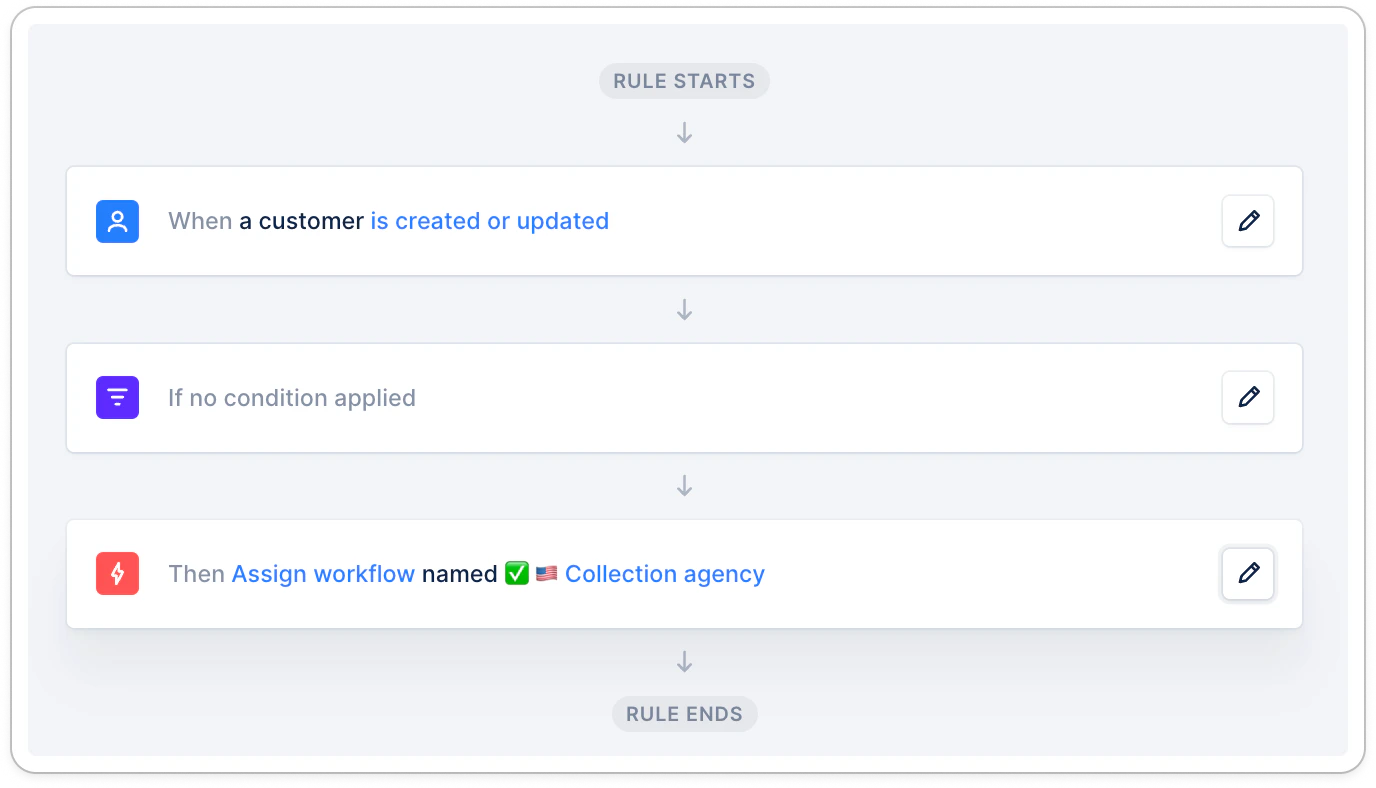 Activate the rule by ticking the option "Trigger all active rules for existing entities", OR
Head to your Customers list view and tick the Customer column. If this is for more than 50 customers, click the blue link at the top right of the list.
Then click Actions > Assign a workflow > select the workflow (here: Collection Agency).
Same process for invoices: Head to your Invoices list view, tick the Reference column, click the blue link > Actions > Assign a workflow > Select the workflow.
### Rule to assign a workflow based on a filter
Activate the rule by ticking the option "Trigger all active rules for existing entities", OR
Head to your Customers list view and tick the Customer column. If this is for more than 50 customers, click the blue link at the top right of the list.
Then click Actions > Assign a workflow > select the workflow (here: Collection Agency).
Same process for invoices: Head to your Invoices list view, tick the Reference column, click the blue link > Actions > Assign a workflow > Select the workflow.
### Rule to assign a workflow based on a filter
 Activate the rule by ticking the option "Trigger all active rules for existing entities", OR
Head to your Customers list view and filter on “Overdue amount = min = 1000”.
Tick the Customer column. If this is for more than 50 customers, click the blue link at the top right of the list.
Then click Actions > Assign a workflow > select the workflow (here: Collection Agency).
Same process for Invoices.
## Rules based on the customer threshold
If you decide to use the following trigger in your rules, "When a customer outstanding amount threshold 'exceeds/falls below' *amount* ", you need to take into account that if:
1. Existing customers already match this amount range, they will not be impacted by the rule.
2. If they are updated (field value, balance), but are still within the same amount range, it will not trigger the rule.
Let's say your rule is the following:
Activate the rule by ticking the option "Trigger all active rules for existing entities", OR
Head to your Customers list view and filter on “Overdue amount = min = 1000”.
Tick the Customer column. If this is for more than 50 customers, click the blue link at the top right of the list.
Then click Actions > Assign a workflow > select the workflow (here: Collection Agency).
Same process for Invoices.
## Rules based on the customer threshold
If you decide to use the following trigger in your rules, "When a customer outstanding amount threshold 'exceeds/falls below' *amount* ", you need to take into account that if:
1. Existing customers already match this amount range, they will not be impacted by the rule.
2. If they are updated (field value, balance), but are still within the same amount range, it will not trigger the rule.
Let's say your rule is the following:
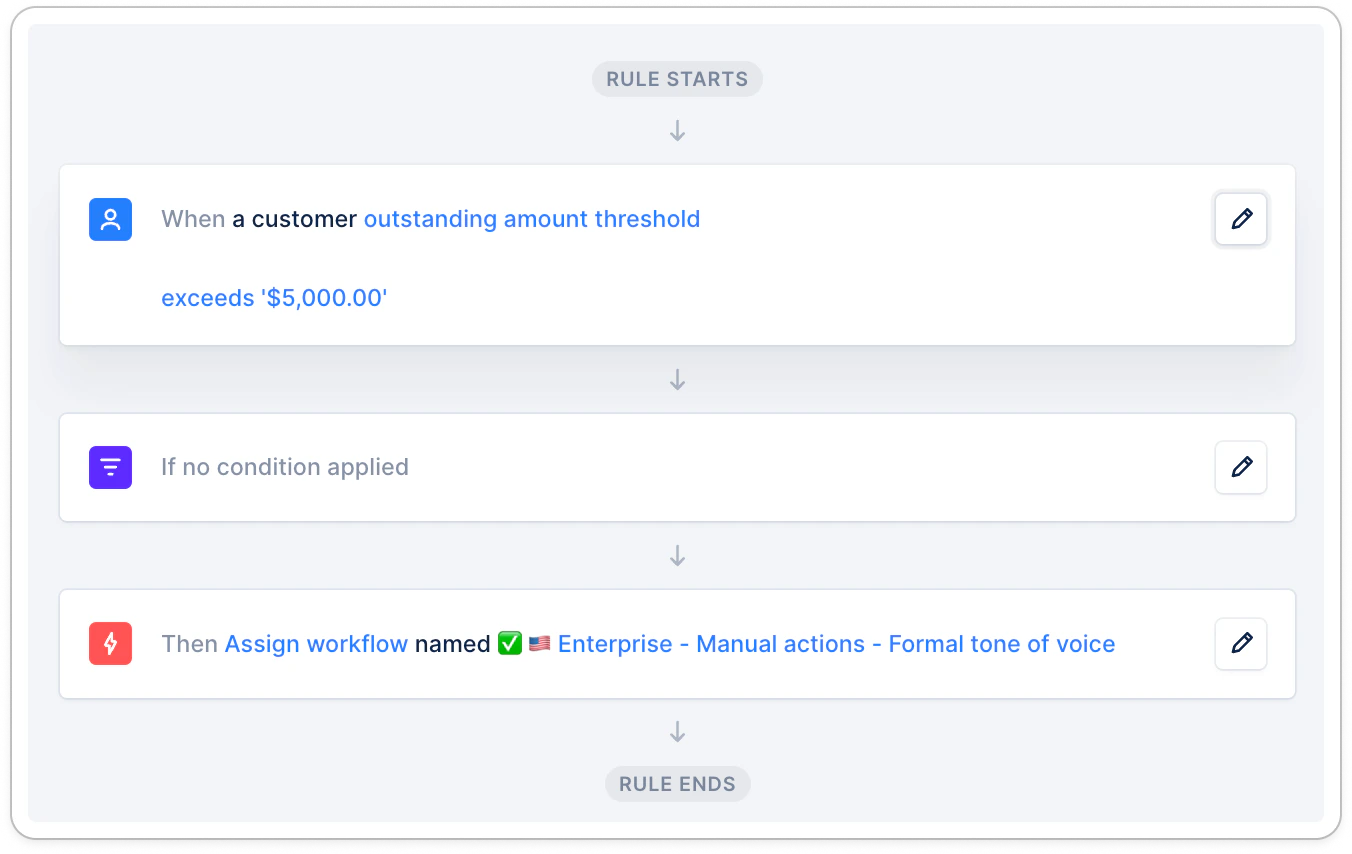 Your customer has a balance of 7k and is assigned to another workflow. They pay one of their invoices for 1k, which updates their balance. But they were already and still are above 5k. As they don't "exceed" 5k, the rule isn't triggered.
### Solutions
First, if you just created the rule, don't forget to mass assign the same behavior manually to existing customers, as detailed higher in the article.
You can create additional rules to take care of special cases as the example above. It can be based on the due, or overdue, or outstanding amount:
Your customer has a balance of 7k and is assigned to another workflow. They pay one of their invoices for 1k, which updates their balance. But they were already and still are above 5k. As they don't "exceed" 5k, the rule isn't triggered.
### Solutions
First, if you just created the rule, don't forget to mass assign the same behavior manually to existing customers, as detailed higher in the article.
You can create additional rules to take care of special cases as the example above. It can be based on the due, or overdue, or outstanding amount:
 🚨 If you have other active smart rules, based on specific conditions, don't forget to take them into account here, and add the specificity to your new rule:
 ### Threshold rules - double management
If you use a rule based on the outstanding threshold, don't forget to create an additional one to support the reversed behavior.
If your rule is to unassign the workflow when the customer threshold **falls below** a certain amount, you'll want another rule to reassign a specific workflow when it **exceeds** a certain amount.
Feel free to share your needs and context with our [Support team](https://support.upflow.io/hc/en-us/requests/new) if you're not sure how to set this up.
## Assign users based on custom fields
### User email address
### Threshold rules - double management
If you use a rule based on the outstanding threshold, don't forget to create an additional one to support the reversed behavior.
If your rule is to unassign the workflow when the customer threshold **falls below** a certain amount, you'll want another rule to reassign a specific workflow when it **exceeds** a certain amount.
Feel free to share your needs and context with our [Support team](https://support.upflow.io/hc/en-us/requests/new) if you're not sure how to set this up.
## Assign users based on custom fields
### User email address
 When using this option:
1. The custom field must absolutely be a TEXT type and contain the user’s email address.
2. If you need to assign more than one person, use one field per user.
3. Ensure the users are created in your Settings > Users, even if not invited.
### One of the fields is empty
If you decide to automatically assign users to your customers, based on custom fields, but one of the fields is empty, rest assured, the users present in the other one(s) will still be assigned.
Let’s say you need to assign three users to (some of your) customers:
1. AE email
2. CSM email
3. Sponsor email
But some customers only have a value in CSM email, while the AE and Sponsor email fields are empty. The CSM will still be assigned to the customer.
### Rule to assign users based on a custom field
When using this option:
1. The custom field must absolutely be a TEXT type and contain the user’s email address.
2. If you need to assign more than one person, use one field per user.
3. Ensure the users are created in your Settings > Users, even if not invited.
### One of the fields is empty
If you decide to automatically assign users to your customers, based on custom fields, but one of the fields is empty, rest assured, the users present in the other one(s) will still be assigned.
Let’s say you need to assign three users to (some of your) customers:
1. AE email
2. CSM email
3. Sponsor email
But some customers only have a value in CSM email, while the AE and Sponsor email fields are empty. The CSM will still be assigned to the customer.
### Rule to assign users based on a custom field
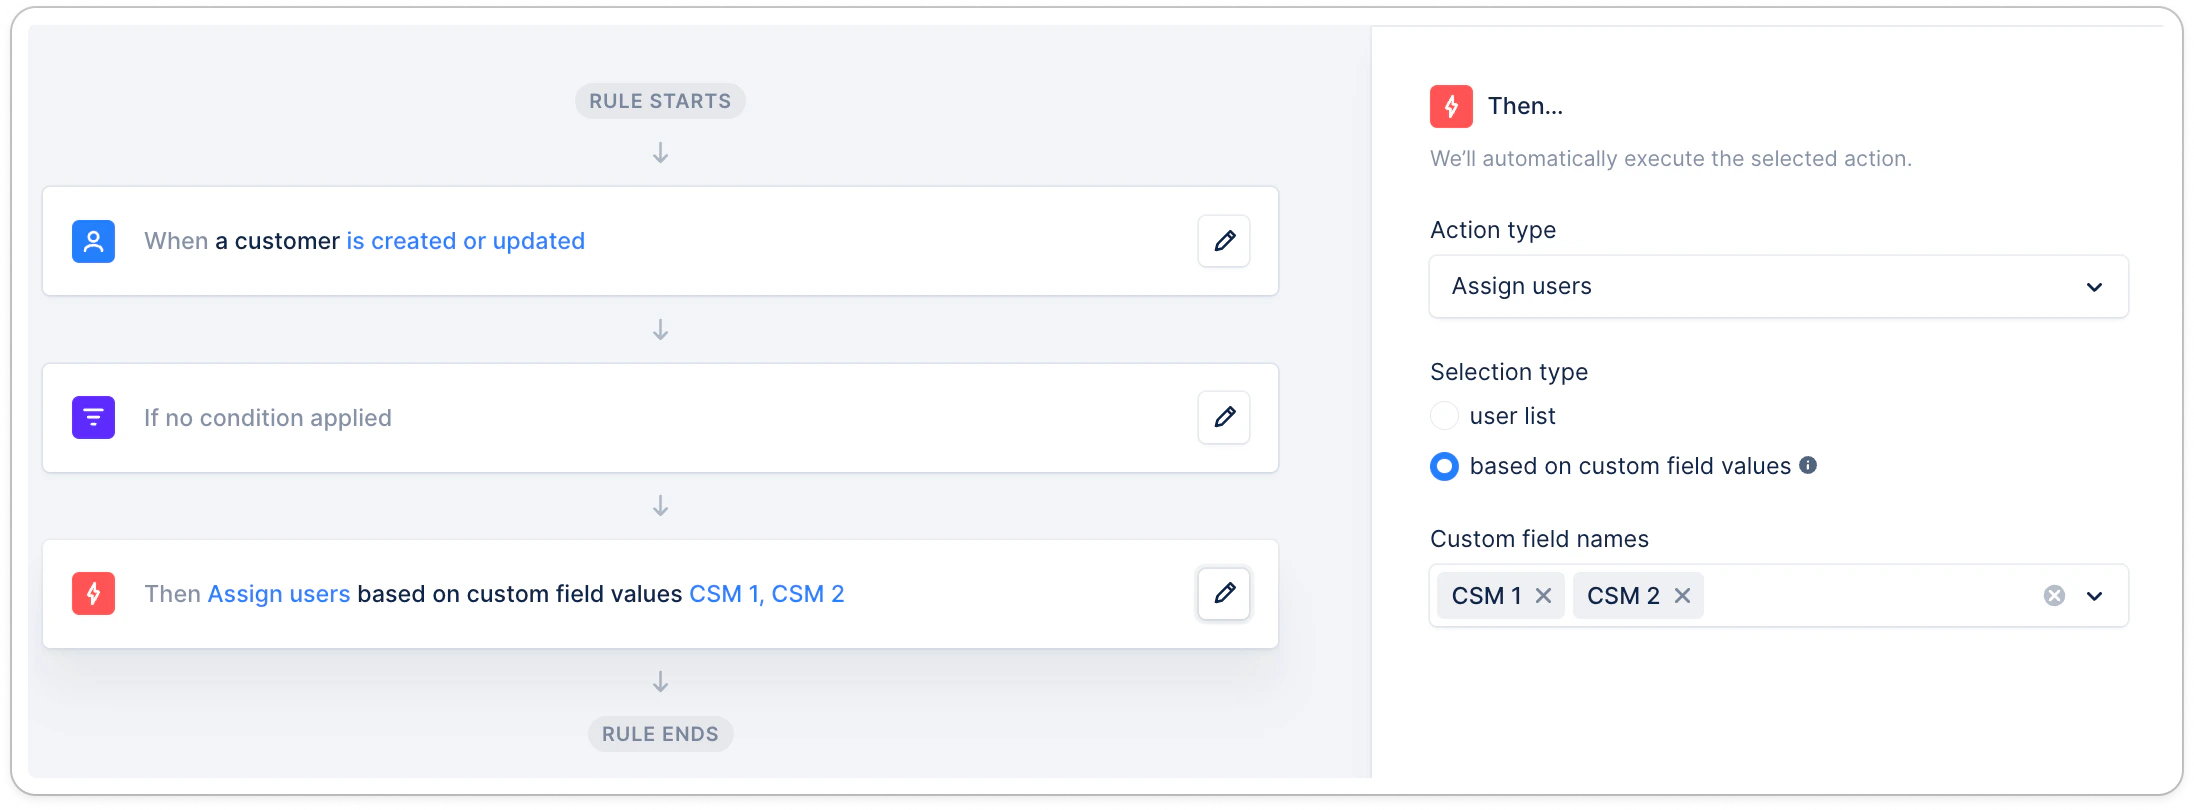 Head to your Customers list view and filter on “CSM 1 = contains = *CSM email address*” - add the additional addresses if more than one field. Apply. (If you added a filter to your rule, add it to the view as well).
Tick the Customer column. If this is for more than 50 customers, click the blue link at the top right of the list.
Then click Actions > Assign users > ensure only the necessary users are ticked in blue, and others have a white box, not grey.
### Rule to assign users based on filters
Head to your Customers list view and filter on “CSM 1 = contains = *CSM email address*” - add the additional addresses if more than one field. Apply. (If you added a filter to your rule, add it to the view as well).
Tick the Customer column. If this is for more than 50 customers, click the blue link at the top right of the list.
Then click Actions > Assign users > ensure only the necessary users are ticked in blue, and others have a white box, not grey.
### Rule to assign users based on filters
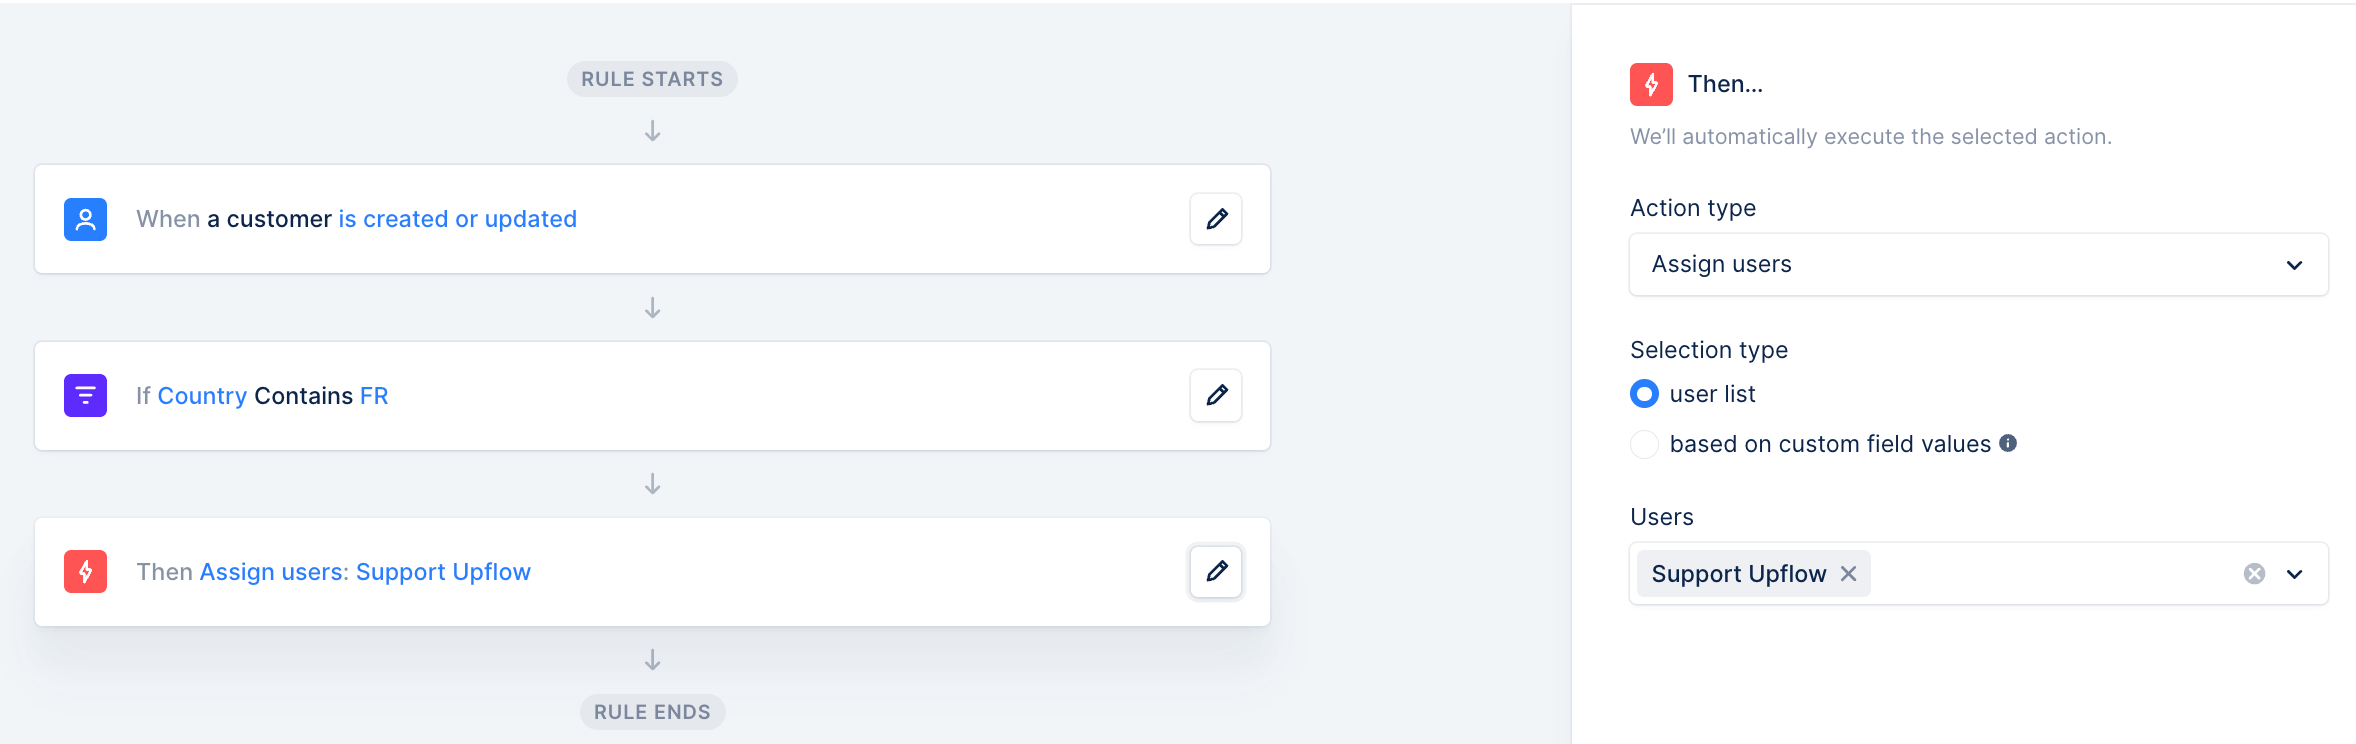 Activate the rule by ticking the option "Trigger all active rules for existing entities".